You open a backup of your photos and see this long list of files like IMG_4729 and IMG_9275? Finding a photo in a folder like that is like looking for a single book in a library where all the covers are blank. What’s my advice? Rename the photos the moment you copy them to your computer. With the right tool, you can give each photo a name, group them into folders, and turn chaos into order in minutes.
In this tutorial, you’ll see how you can use CopyTrans Studio to perform this action in just a couple of clicks and organize your photo library on your PC so that it’s quick and easy to find any photos you want.
How to rename a photo on iPhone
- Download and install CopyTrans Studio. Download CopyTrans Studio
- Click on the CopyTrans Studio icon. Open the program.
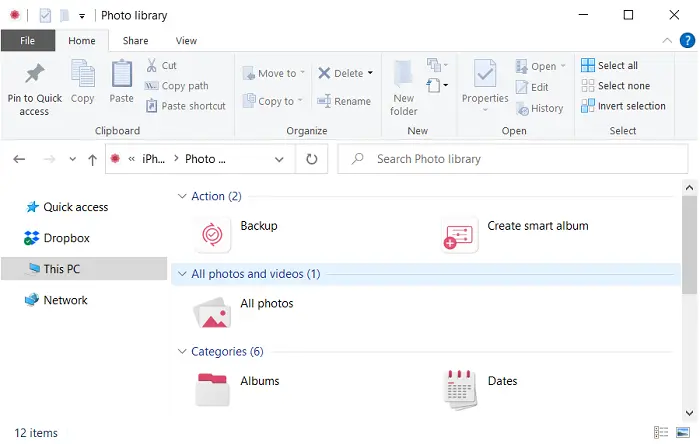
- Select your iPhone and click on “Photo Library”.
- Now choose the Backup option
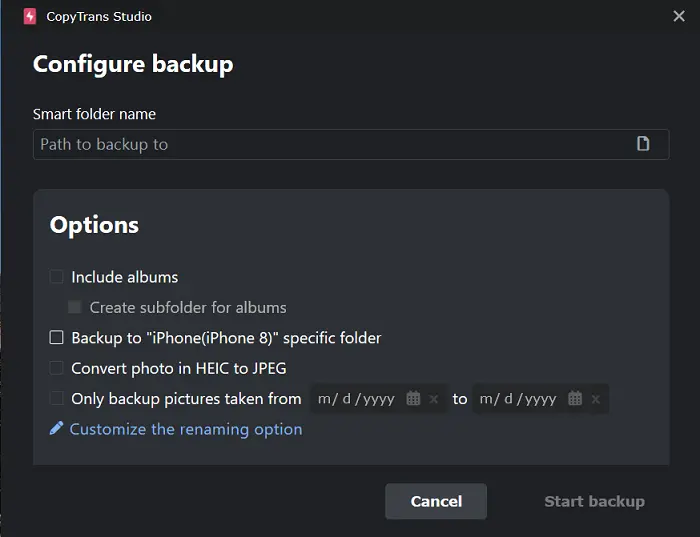
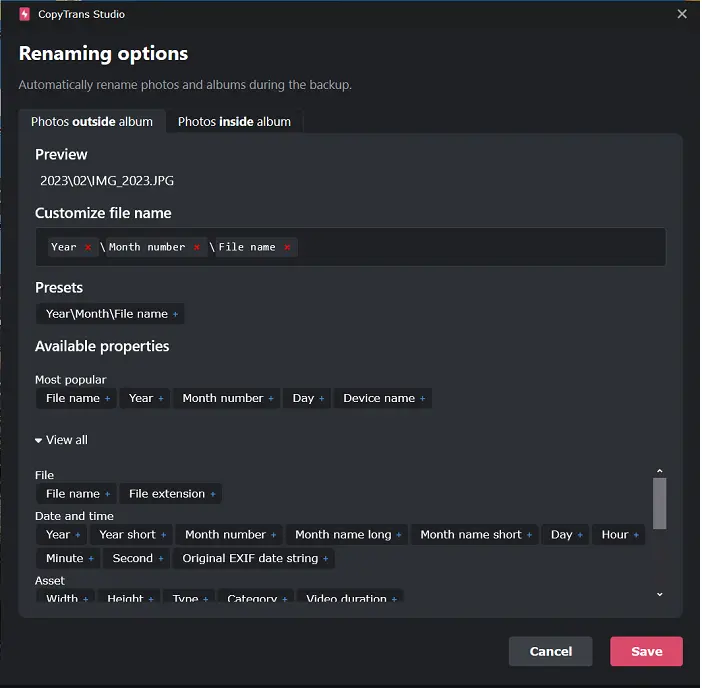
- The Configuration Backup window will appear. Click on “Customize the renaming option”.
- Now you can Customize the File Name. This is the standard setup for reneaming, but it’s possible to change that.
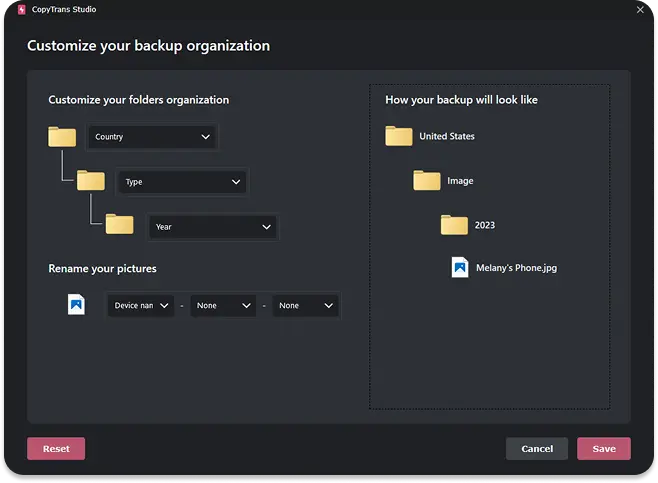
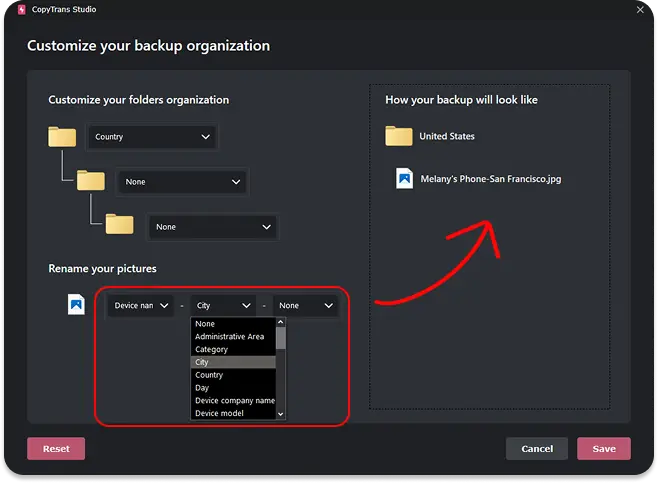
- You can automatically rename photos and sort them into folders based on key parameters such as date, country, city, device, etc. Choose up to 3 levels of folders…
- … and customize file names with up to 3 components of your choice (date, time, country, etc.)
- Now, when all the settings are done, you can click on “Save” and then “Start backup”.
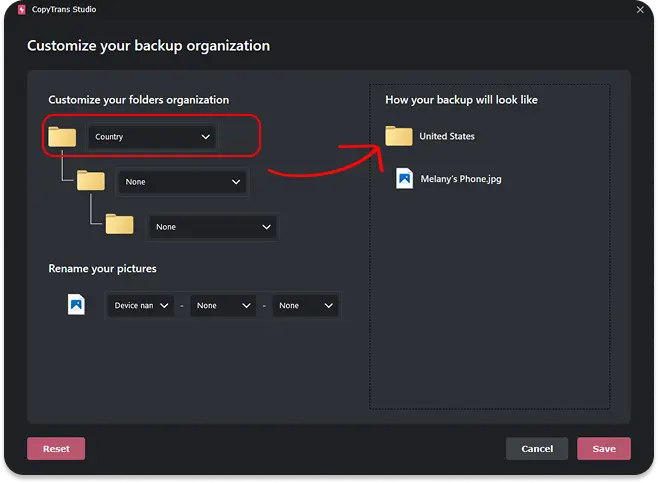
- Now you will find all the photos saved on your PC! Check out the photo structure.

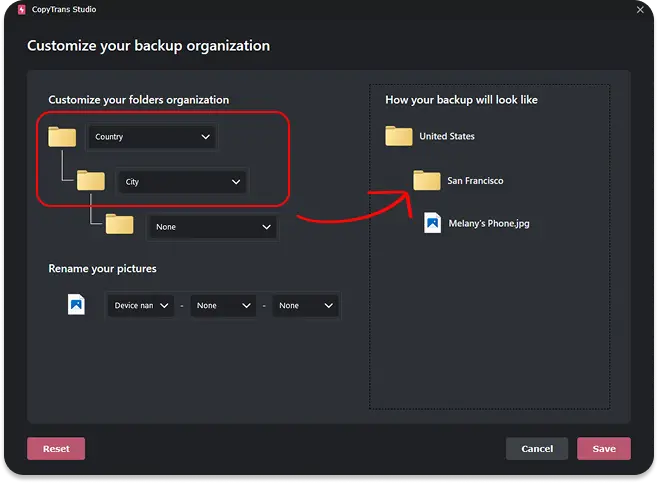
Take into account that you can set each folder separately and not to use all 3 folders. You can make only one if you wish.
If you prefer a previous version of renaming:
THEN FOLLOW THE STEPS BELOW:
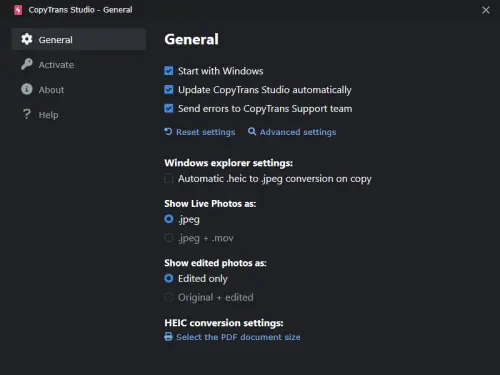
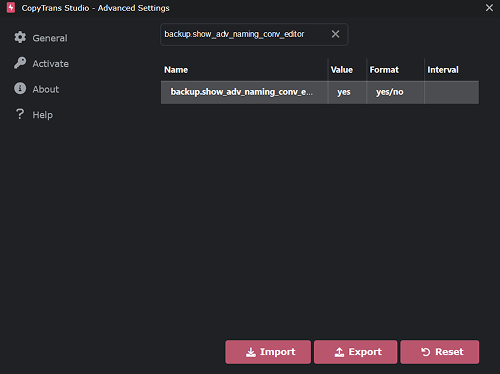
Open the Settings and then Advanced Settings
And then search for the setting: backup.show_adv_naming_conv_editor and change setting to YES
Now open CopyTrans Program and you are ready to back up your iPhone
Ready to say goodbye to IMG_#### forever?
Final Thoughts
Now your photos are not just faceless files, but a structured and organized system where you can find any photo quickly and easily. With CopyTrans Studio you no longer have to scroll through endless numbers, no need to lose your photos in cluttered folders:
- Automatically rename photos with meaningful details like date, time, location, or device model.
- Sort into up to three levels of folders — for example, Year → Month → Event — so browsing feels natural.
- Organize videos and photos together so you never lose the context of a moment.
- Preserve original metadata like EXIF info, so all technical details stay intact.
Download CopyTrans Studio and start turning your chaotic camera roll into a perfectly organized gallery. Your memories deserve names, not codes.