Thanks to the amazing advancements in technology, the cameras on our smartphones and other devices are now capable of capturing stunning, high-quality photos. However, these devices often save images in a file format called HEIC. While HEIC offers excellent image quality and smaller file sizes, it may not be compatible with your Windows PC. But don’t worry! If you’re facing compatibility issues or simply prefer the JPG format, we’ve got you covered. In this article, we’ll give you easy steps on how to convert HEIC to JPG.
What is HEIC?
HEIC (High Efficiency Image Format) is a file format developed by the Moving Picture Experts Group (MPEG) that provides high-quality images using advanced compression techniques. It offers better image quality and smaller file sizes compared to traditional formats like JPG. This means that users can now enjoy stunning visuals without sacrificing precious storage space on their devices.
If we compare HEIC with formats like JPG, the superiority of HEIC is evident as it can capture more intricate details and vibrant colors, resulting in a truly immersive visual experience. Everything is good with this format but the compatibility is. While many newer devices and operating systems have adopted this format, others may still struggle to read or view HEIC files.
What does the future hold? Who knows, but the increasing adoption of HEIC in the industry suggests that it may soon become a universal format, making high-quality images easily accessible to all.
Why Convert HEIC to JPG?
Here are the reasons why you might want to convert HEIC to JPEG:
- Compatibility: some devices, platforms, and image editors don’t support HEIC. When you convert to JPG, you ensure that your photos can be viewed and edited on your Windows PC and other devices.
- Sharing: if you want to share photos with others or upload them to websites or social media platforms, JPG is the most widely supported format. Converting to JPG ensures that your photos can be easily viewed by everyone.
- Editing Flexibility: many photo editing tools offer more options and features for working with JPG files compared to HEIC. Converting to JPG allows you to take full advantage of these editing capabilities.
Convert HEIC to JPG
If you’re looking for an easy way to convert HEIC to JPEG, CopyTrans Studio will make it easy. It’s a program designed to transfer photos from iPhone to PC, and it will take care of the format conversion for you. You can save the photos on your computer, and then утощн them in any program.
How to convert HEIC to JPG on windows? Just follow our step-by-step guide:
- Download and install CopyTrans Studio and CopyTrans HEIC will be installed automatically. Download CopyTrans Studio
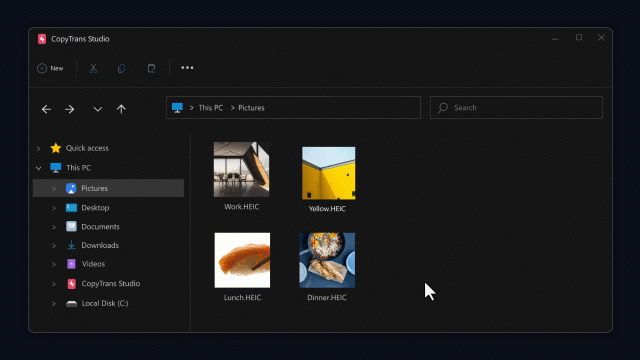
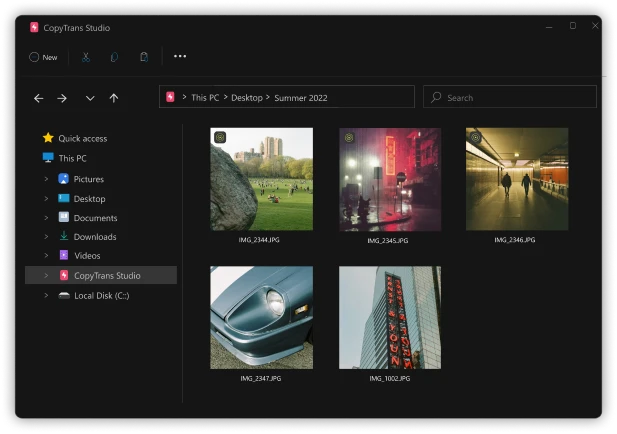
- Open a folder with HEIC photos and select the images you need to convert.
- Now right-click and choose the option “Convert to JPEG with CopyTrans”.
- And that is it. All the HEIC are converted to JPEG in two clicks.
Note: this method works when the HEIC photos are already saved on your PC. If you need to transfer them from your iphone directly in JPEG, use one of the methods below.
Converting HEIC to JPG
When transferring to PC
CopyTrans Studio also allows you to set automatic conversion to JPG when you save iPhone photos to PC:
- Download and install CopyTrans Studio. Download CopyTrans Studio
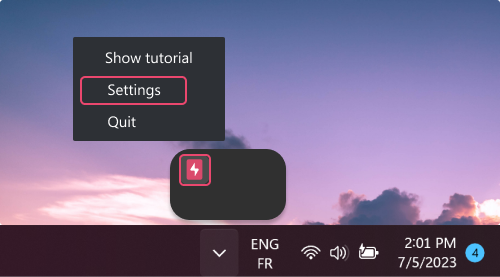
- After installation, the icon of CopyTrans Studio will appear in the “hidden icons” area in the task bar. Right-click on the CopyTrans Studio icon and then on Settings.
- In the Settings window check the box Automatic .heic to .jpeg conversion on copy. Now you are ready to save iPhone photos on PC.
- You can back up the whole Photo Library in a few clicks or save separate folders or photos. Here is a full guide on how to transfer photos on your PC.

How to turn HEIC to JPG
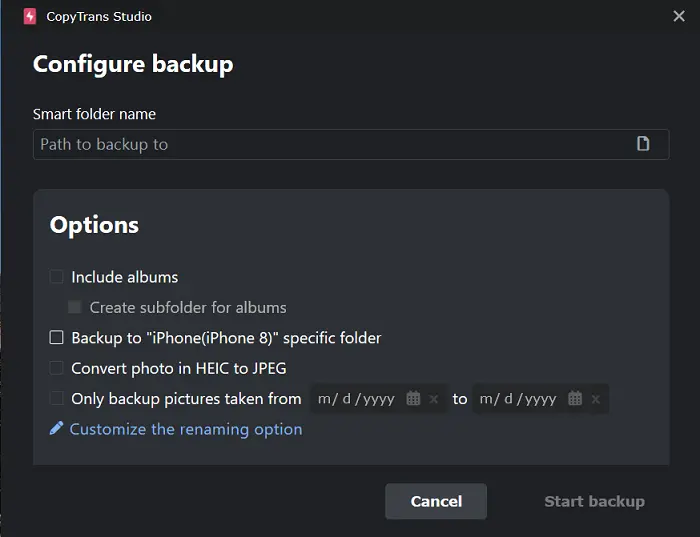
Full back up automatic conversion
You don’t have to change any settings on your iPhone or in CopyTrans Studio – you can keep HEIC as your original photo format. But when it’s time to back up your photo library to your computer, CopyTrans Studio gives you the option to automatically convert HEIC file to JPG. This way, your photos will remain in their original quality on your iPhone, while the copies on your computer will be saved in a more versatile format that can be opened and used anywhere.
- After you download and install CopyTrans Studio. Connect your iPhone. Download CopyTrans Studio
- Choose your iPhone.
- Now Choose the Backup Option.
- A Settings Window will appear. Now choose the option Convert photos in HEIC to JPEG and back up your Photo Library.
- That’s it! Now all your HEIC photos will be saved in JPG on your PC.
Change HEIC to JPG
By folders
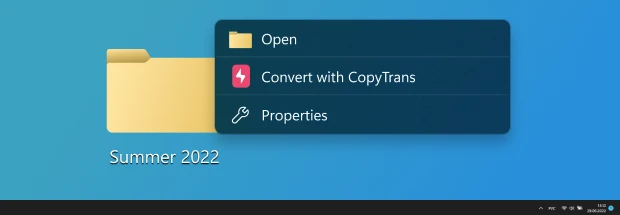
Thanks to this amazing new feature you can convert an entire folder from HEIC to JPG. No need to select each file, just 1 click and the job is done. The process is the same as with 1 file conversion, but in this case you select the entire folder. Here is how it looks:
- Find a folder with HEIC images on your PC. Right click on it to see the Context menu. Find “Convert with CopyTrans”:
- Select the option and wait for the transformation to be done. Enjoy!
Convert from HEIC to JPG
FAQ
Why do my HEIC photos display normally on my iPhone but not on other devices?
HEIC is optimized for the Apple ecosystem, not for universal compatibility. While iPhones and Macs handle this format without any problems, many Windows applications, older Android phones, websites, and email clients do not support it. Converting HEIC to JPG eliminates these problems and allows you to open your photos anywhere without additional plugins.
Does converting HEIC to JPG always reduce image quality?
Not necessarily. HEIC is more efficient, but a high-quality export to JPG can look almost identical to the original for everyday use. The key is choosing the right conversion method—some tools default to over-compressing files, while others preserve detail and color depth.
Can I convert HEIC to JPG without uploading my photos to the internet?
Yes, and this is often the safer option. CopyTrans Studio allow you to convert files locally, so your photos never leave your device. This is especially useful if the images are personal, work-related, or confidential.
Why do some HEIC to JPG converters change colors or brightness?
This is usually due to color profile processing. HEIC supports extended color spaces, and some converters do not translate them correctly when exporting to JPG. Using a tool that takes color profiles into account helps preserve the appearance of your photos as they were when taken.
Is it better to convert HEIC to JPG before or after editing?
In most cases, convert after editing. HEIC preserves more image data during editing, especially when adjusting exposure and color. Once you’re done editing, exporting to JPG gives you a publish-ready version that works everywhere.
If JPG is more compatible, why doesn’t Apple use it by default?
Because HEIC saves space without compromising visual quality. Apple prioritizes storage efficiency and iPhone performance. JPG is better for sharing and compatibility, while HEIC is better for shooting and storing photos. Conversion bridges the gap between the two.
HEIC vs JPEG
Conclusion
Have you ever had trouble working with HEIC files on your computer? They’re great for saving space on your iPhone, but not so great when you just want to open or share a photo without the hassle. That’s where CopyTrans Studio comes in handy. You don’t have to mess around with iPhone settings – just transfer photos as you normally would, and the app will automatically turn HEIC to JPG. Very simple.
It saves time, takes away the file headaches, and lets you save your photos in their original quality and in a format that works everywhere. So if you’re backing up your photo library or just want to avoid the “why won’t this open?” situation. – this is an easy solution. Definitely worth a try if you want your iPhone and PC to play nice when it comes to photos.