Managing images on your iPhone can be a daunting task, especially if you need to save iPhone photos for a specific date. If the photos are relatively new, it’s easy to find them in the most recent photo album. However, things become more complicated if the photos are buried deep within your gallery, forcing you to scour through the countless folders in the DCIM directory to locate them.
The frustration and time required for this task can be overwhelming, and it can be hard to know where to start. Luckily, there is a simple solution that makes it easier to locate the photos you need. Instead of scrolling through each photo in the gallery, you can create a custom iPhone album based on a criterion of your choice. For example, you can pick photos from a particular date, or set a range of dates from… to… This makes it easy to select and save all the photos you need, without having to spend hours searching.
Follow the steps below to sort out the photos you need. CopyTrans Studio makes it easy.
Back up iPhone photos to PC by date
CopyTrans Studio is a managment tool for iPhone photos and videos. It allows you to save the recently made photos, and also to easily locate a range of photos of a date of your choice. I will show you how to do that by saving iPhone photos from Christmas 2023 using the Smart Albums function in CopyTrans Studio:
- Click on the button below to download and install CopyTrans Studio on your PC. Download CopyTrans Studio
- Click on the CopyTrans Studio icon. Open the program.
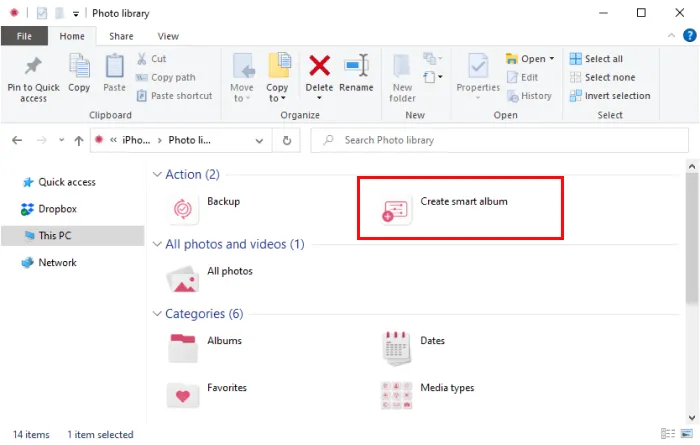
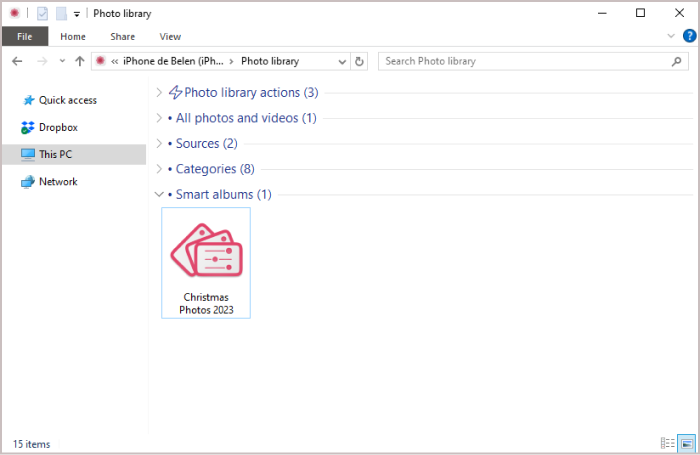
- After you select your iPhone, choose “Photo Library”.
- Now you see the option you are searching for: “Create Smart Album”.
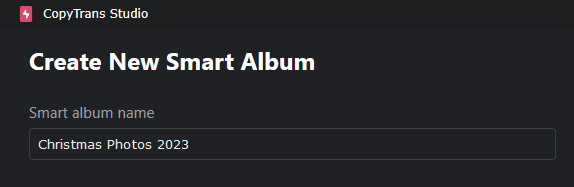
- In the settings window, name the album. In this album you will save photos from the dates or events of your choice: birthday, Christmas or any other holiday. Choose an appropriate name for the album, e.g. Christmas 2024, so you can easily find it later
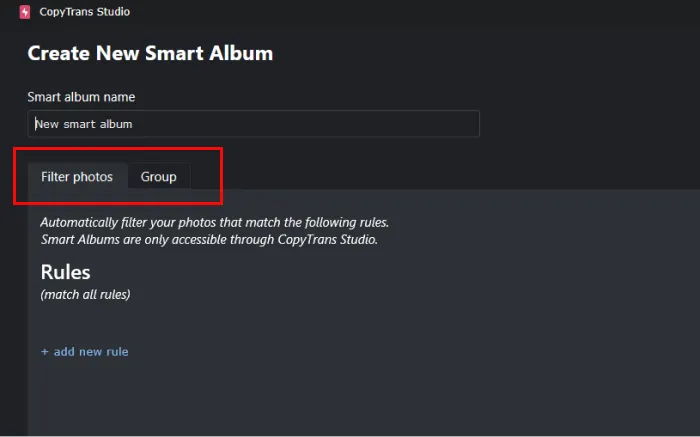
- Select Filter Photos to create an album following your criterion (date, for example). If you select Group Photos, all your photos will be grouped according to the rules you choose. Click on “add new rule” after that.
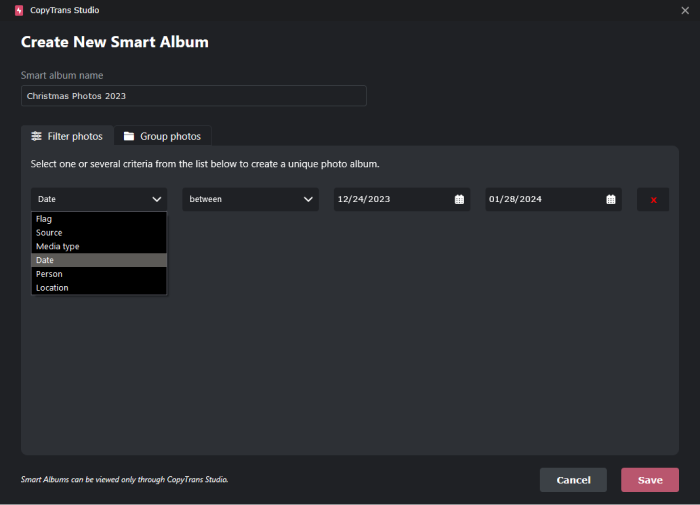
- From the drop-down menu choose the date option and add the required time period, and click on Save.
- Now all the photos from the selected date range are saved in a Smart Album. To copy it to your PC, just drag-and-drop it to a folder of your choice.

You will not see this album on your iPhone, as it will be displayed only in CopyTrans Studio.
Conclusion
To wrap it up, organizing and saving iPhone photos by date can really up your photo game. Whether you’re hunting for pics from a special event or itching to create a custom album based on specific dates, following the steps in this article will save you heaps of time and frustration. Thanks to handy tools like CopyTrans Studio and its Smart Albums function, you can effortlessly locate and back up your photos without endless scrolling through folders. Say goodbye to the chaos and ensure your beloved memories are organized and secure, ready for you to revisit anytime. So why wait? Start using these methods today and bring some order to your iPhone photo library by date. Happy sorting!