
Photos have long been the primary way to capture memories, but they only capture a single moment. And what if you want more – to see what happened before or after the shutter clicked? Here’s when you find out the Apple Live Photo feature.
Introduced in 2015 with the iPhone 6s, Live Photos revolutionized the way we document moments by recording 1.5 seconds of motion and sound before and after the shutter button is pressed. The result is not just a still image, but a mini video clip wrapped around a high-resolution photo.
In this guide, I will cover the following topics:
- 1. What is Live photo?
- 2. Live photos tips for your iPhone
- 3. How to transfer Live photos to PC
- 4. How to view Live photos on your Windows PC
What is Live photo?
Live Photo is a hybrid format that combines a high-quality still image with a short video clip. When you take a Live Photo, your iPhone captures 1.5 seconds of video and sound before and after you press the shutter button. This produces a dynamic photo that “comes to life” when you tap and hold it in the gallery.
Technically, a Live Photo consists of two related files: a JPEG or HEIC image and a MOV video file. On the iPhone, however, they are merged together and displayed as one seamless element.
Keep in mind that while Live Photos work flawlessly in the Apple ecosystem, if you transfer them to non-Apple devices or platforms, motion and sound may disappear and only a still image remains. Fortunately, there are tools and methods to help you keep the “live” part when transferring or sharing photos.
Live photos tips for your iPhone
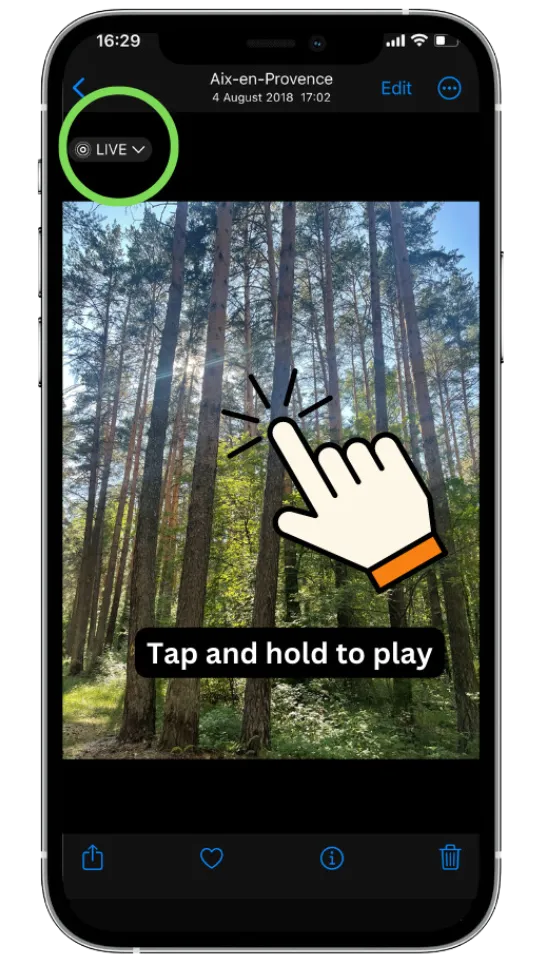
- Your Live photos in your Gallery are marked with a special icon (top left corner of the photo).
- To view Live photo, select the image and then tap and hold your finger on it. Don’t forget to turn on the sound – you might hear something interesting 😀
- To access to all your Live photos on the device, select your Photos app > Albums (bottom bar) > scroll down till media types.
How to transfer Live photos to PC
What makes Live Photos really interesting is how Apple has designed them to stay “live” mostly on your iPhone. Unlike regular media files, Live Photos don’t have a special separate format – they’re a clever combination of two separate files working together behind the scenes.
So what happens when you transfer a Live Photo to your computer? Instead of one file, you get two: the original image (saved as a .JPEG or .HEIC, depending on your camera settings) and a short .MOV video file containing motion and sound. They are like dance partners: connected but separate.

But here’s the catch, if you’re using a Windows PC, things get more complicated. By default, Windows doesn’t recognize the .HEIC photo format or .MOV video file format the way the iPhone does. Instead of smoothly displaying your beautiful Live Photos, Windows either ignores some of the motion or struggles to open the files, often forcing you to buy additional plug-ins to make them work.
Sounds annoying, right? But don’t worry. Now, I’ll walk you through simple and practical ways to transfer Live Photos from iPhone to PC and show you how they come to life on your computer – no confusing programs or expensive add-ons needed. Get ready to transfer those memories from your phone to your desktop, preserving them in motion and sound.
- Start CopyTrans Studio on your PC and connect your iPhone with cable or WiFi. Here is a download link if you haven’t installed CopyTrans Studio yet. Download CopyTrans Studio
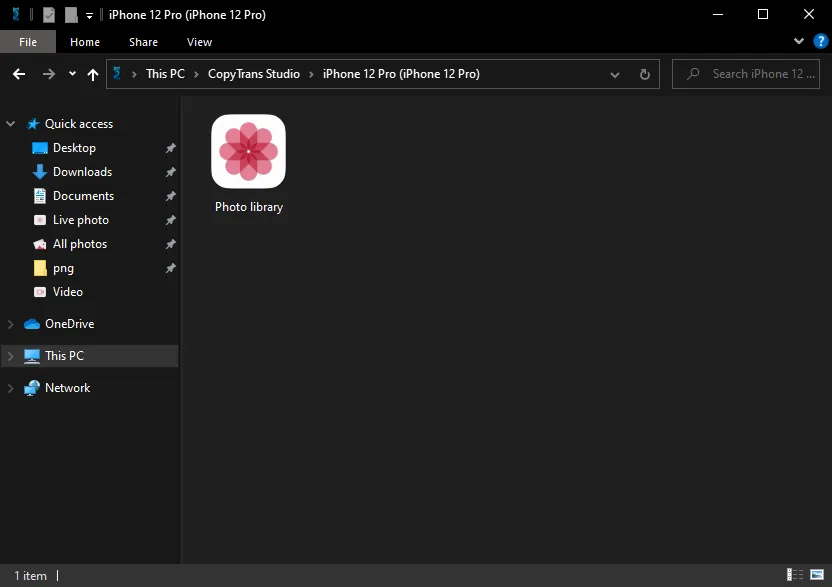
- Select your device, then click on “Photo Library”.
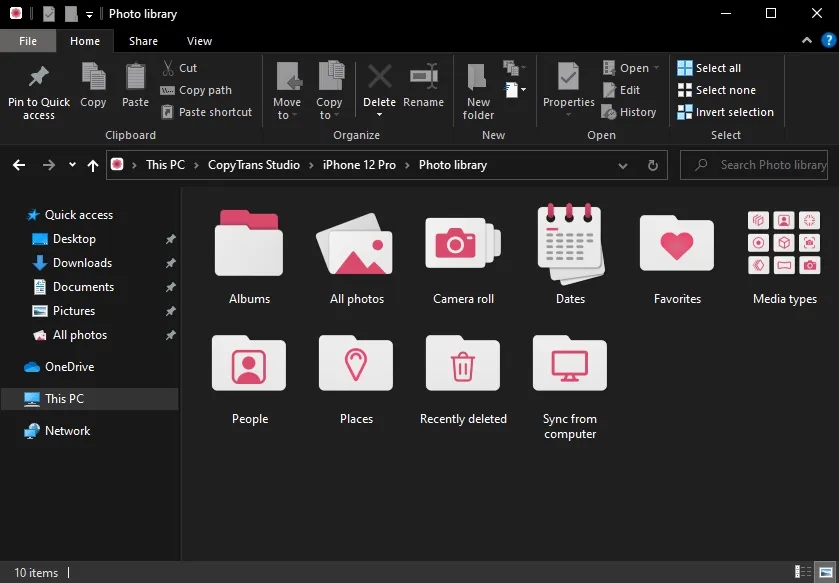
- You can now access your iPhone camera roll or Albums to pick your Live photos. However, CopyTrans Studio has a trick for easier search: select “Media types” and then choose “Live photos” to display all photos of this type.
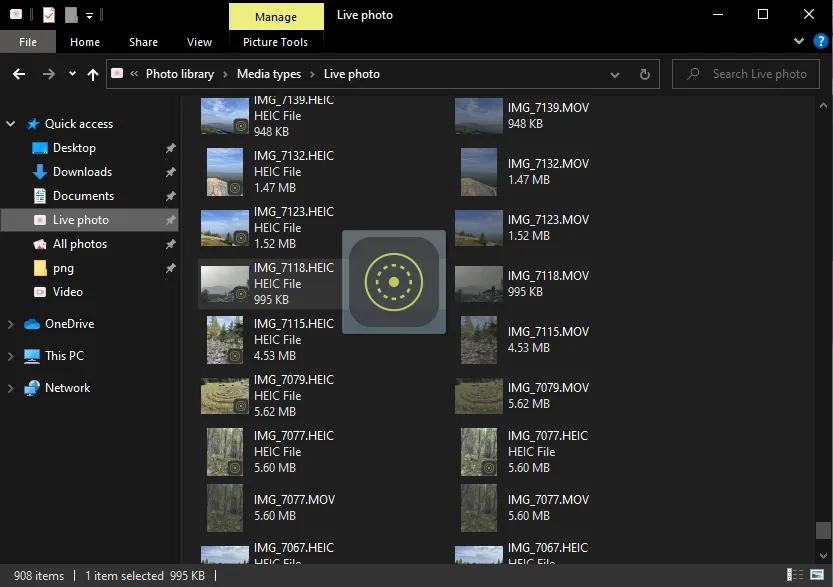
- CopyTrans Studio is going to display all your Live photos just as your iPhone does. On the screenshot below, you see the still .heic photos on the left and the video .mov versions of Live photos on the right.
- To transfer Live photos to PC, you have two options:
Manually select your images and drag them to a folder on your PC. Hint: you can select just the photo file, CopyTrans Studio will save the associated video automatically.
Select the whole “Live photos” folder and drag it to your PC.

How to view Live photos on your Windows PC
- So, the photos that can be viewed in “Live” mode are marked with CopyTrans Viewer logo.To view them in action, do a double left click on the image file (.jpeg or .heic). If the image doesn’t move, hover your mouse over it.
- You can then use side arrows to go through your Live gallery. Don’t forget to turn the sound on and enjoy!
To view Live photos in motion on your PC, open them with CopyTrans Viewer. This is integrated in CopyTrans Studio, completely free and helps you to display Apple tricky formats without installing additional codecs.
Important: to keep your photos “Live”, be sure to keep the .mov file as well.
More information about how to view iPhone Live Photos in motion in our detailed guide!
Live Photo iPhone
Final Thoughts
Live photos are not just a fun feature, they are a quiet and powerful way to keep life as it is. They capture not just a face, but a flicker of emotion. Not just a place, but the feeling of being in it. And while they are most natural in Apple ecosystem, with the right tools they don’t have to stay trapped in your iPhone.
Now you know what Live Photos are, how to view and manage them, and how to transfer them to your computer without losing their magic. Because sometimes the best part of a photo isn’t the image itself. It’s the second before it.