I wanted to be a blogger. Sounds familiar? Or maybe you are just a fan of photography? Or you want to start your creative career? It doesn’t matter. Photography is an art form that requires skill, creativity, and a keen eye for details.
If you think that you need a professional camera to take photos of high quality, then you are not right! Many modern smartphones, such as the iPhone, offer a range of settings and options that can help you capture professional-grade images. In this article, we will find out the essential settings you can adjust to improve your photography skills and to take stunning, professional-quality photos with your iPhone.
- Tips to Take Professional Photos with iPhone
- Transfer photos from iPhone to PC
- How to take good photos with iPhone: FAQ
Tips to Take Professional Photos with iPhone
TIP 1: Image Format and Quality:
RAW vs. JPEG: Choose the RAW format rather than JPEG to retain more image data and have more options for greater flexibility in post-processing. RAW files preserve more detail and color information, which will help you to upload photos in greater quality.
High-Quality Setting: Make sure your iPhone camera is set to capture photos in the highest quality available. Opt for settings like HEIF (High-Efficiency Image Format) to maintain image integrity.
TIP 2: Focus and Exposure Control:
Manual Focus: Experiment with manually adjusting the focus on your iPhone camera. Tap on the object on your screen to set the focus. That way, the object stays crisp and in focus, even in challenging lighting conditions.
Exposure Lock: Use the exposure lock feature on your iPhone camera to control the exposure independently of the focus. Tap and hold on the screen to lock the exposure settings, then refocus your shot without affecting the exposure level.
TIP 3: White Balance and Color Settings:
White Balance Adjustment: Adjust the white balance settings of your iPhone camera to get accurate colors in different lighting conditions. Experiment with presets like Daylight, Cloudy, or Tungsten to achieve natural-looking colors in your photos.
Color Temperature: Fine-tune the color temperature of your photos to create a specific mood or aesthetic. Adjust the warmth or coolness of the colors to evoke different emotions and enhance the overall look of your images.
TIP 4: Grid and Alignment Guides:
Rule of Thirds Grid: Activate the rule of thirds grid on your iPhone camera to assist in composing well-balanced and visually appealing shots. Align your subjects along the grid lines and at the intersection points for a harmonious composition.
Level and Straighten: Use the built-in leveling tool on your iPhone camera to make sure that your photos are straight and aligned correctly. Avoid crooked horizons or tilted perspectives by using the level indicator to achieve a professional-type image effect.
TIP 5: Portrait Mode and Depth Control:
Portrait Mode: Take advantage of Portrait Mode on newer iPhone models to create beautifully blurred backgrounds and accentuate an object. Experiment with different aperture settings and adjust the depth effect to achieve professional-looking portraits with a shallow depth of field.
Depth Control: Fine-tune the depth effect in post-processing using the Depth Control feature on your iPhone. Adjust the background blur intensity to achieve the desired amount of bokeh and isolate your subject effectively for striking portrait shots.
TIP 6: Basic actions:
Taking professional photos with your iPhone involves a mix of techniques and understanding your device. Don’t forget about the basic things:
- Start by cleaning your lens to remove dirt
- Favor natural light whenever possible and avoid harsh midday sun
- Experiment with portrait mode to create a beautiful background blur
- Make sure to tap on the screen to lock the focus on an object, which can be particularly useful for portrait photography
Transfer photos from iPhone to PC
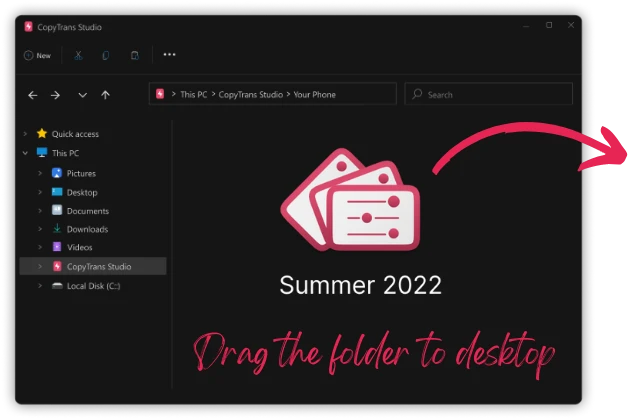
After you made all these professional photos, you may need to save them on your PC. With CopyTrans Studio, you can do it in a few clicks: make a full backup, save an album or photos of your choice.
- Download and install CopyTrans Studio Download CopyTrans Studio
- Click on the CopyTrans Studio icon. Open the program.
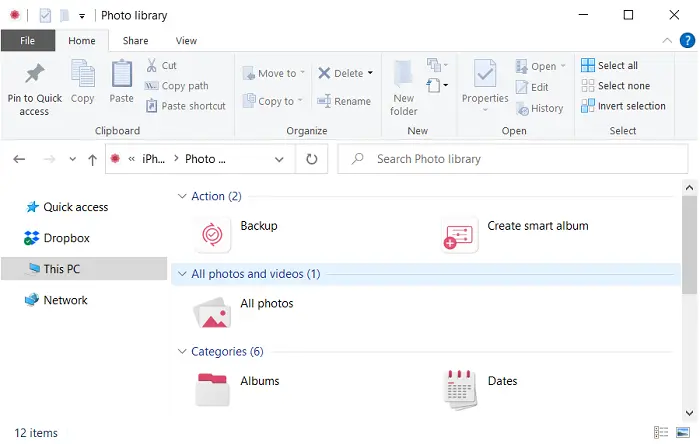
- Select your iPhone and click on “Photo Library”.
- In the CopyTrans Studio main window, you will find different options:
Choose the Backup option
 Or drag-and-drop the albums from CopyTrans Studio to your PC


How to take good photos with iPhone
FAQ
What are the best settings for iPhone photography?
To achieve stunning results in iPhone photography, it is essential to understand the iPhone camera settings.
- be sure that you have the latest software update, as Apple continuously improves the camera features
- set your camera app to automatically adjust settings
- to gain more control, explore options like portrait mode for depth and natural light for clarity
- turn on the grid to follow the rule of thirds, enhancing the composition
- don’t forget to check the brightness settings and use the zoom feature wisely to avoid blur in your images
What is the importance of lighting in iPhone photography?
Lighting is one of the most critical aspects of photography. When taking pictures with an iPhone, natural light is often the best asset for getting stunning images. The golden hour—shortly after sunrise or before sunset—provides soft, warm light, ideal for taking photos with an iPhone. Avoid shooting in harsh midday light, which can cause overexposure and unflattering shadows. If you’re indoors, position your subject near windows for the best results. Always assess the light condition before you take a photo to ensure optimal exposure.
How do I edit my photos taken with an iPhone?
Editing is a vital step in the process of creating professional photos with an iPhone. You can use the built-in editing tools in the Photos app, which help to adjust exposure, contrast, and color saturation. For more advanced edits, consider using apps like Lightroom or Snapseed, which offer a wide range of functions.