You connect your iPhone to your computer, expecting to easily transfer photos, but instead you are greeted by a maze of folders named 100APPLE, 101APPLE, 102APPLE, and a dozen others. None of them match the albums on your iPhone. None of them tell you where last weekend’s photos are actually located.
The situation becomes even more confusing when some videos don’t show up at all, or a large file stops halfway with a “device not available” error. As a result, you open folder after folder, finding a mixture of HEIC, MOV, screenshots, old vacation photos, and random selfies, all mixed together. So, as we see the structure itself doesn’t make sense from a user’s perspective.
And there’s a reason for that. The DCIM folder exists because of an old camera standard, not because it’s the best way to organize a modern photo library. That’s why it seems so chaotic and unpredictable.
In this article, I’ll explain what the DCIM folder really is, why it behaves this way, and how to navigate it without wasting time. And if you’re ready for something simpler, I’ll also show you an easier way to transfer photos without dealing with these endless subfolders.
- What is DCIM folder?
- How the DCIM folder works on iPhone?
- Typical problems you can face
- CopyTrans Studio vs DCIM folder
What is DCIM folder?
DCIM stands for Digital Camera Images, and the name already hints at its origin. It was not invented by Apple and was not developed specifically for the iPhone. In fact, it is a universal system followed by all digital cameras, from old compact cameras to digital SLR cameras.
This structure comes from the DCF (Design rule for Camera File system) standard. Simply put, it is a set of rules created many years ago so that cameras could store photos in a predictable way and computers could read them without additional software. Any device that acts as a “camera” must present its photos in the same format and the iPhone is no exception.
That’s why when you connect your iPhone to a Windows computer, it shows you a DCIM folder instead of the albums you see in the Photos app. It’s not about convenience, it’s about compatibility. Windows and many photo apps immediately recognize the DCIM structure, so Apple uses it as the standard bridge for transferring photos.
How the DCIM folder works on iPhone?
When you open the DCIM folder, you will see several subfolders with names such as 100APPLE, 101APPLE, 102APPLE, and so on. This is not a coincidence, it is also part of the old standard for cameras.
Why your photos are divided into multiple subfolders?
The iPhone cannot put all your photos in one folder because DCF rules limit the number of files a single folder can contain. So your iPhone creates new folders as your library grows. Instead of grouping by date or album, it groups by “folder capacity”, so photos from yesterday, last week, and last month may be mixed together.
Why everything looks different in Windows?
Windows Explorer does not read the structure of the Photos app, so it displays the original camera structure. This means that:
files are not sorted by album
recent photos may appear in old folders
Live Photos appear as separate files
changes are not always reflected in the preview
Why DCIM can only be accessed via USB?
Another feature: the DCIM folder can only be opened when the iPhone is physically connected and unlocked. It cannot be viewed remotely from Explorer because the folder does not exist as a regular folder in iOS, it is only created when necessary for a USB connection. Here’s why:
the folder disappears when you turn off your phone
Windows may not display all files until you unlock the screen
photos that are only available in iCloud will not appear in DCIM at all
DCIM
Typical problems you can face
Most people expect to see some kind of order when they open the DCIM folder, for example, photos grouped by date or album. Instead, everything looks scattered. Here are the common problems:
Photos appear in random folders: the iPhone divides media files into subfolders, such as 100APPLE or 101APPLE, based on capacity rather than date. Therefore, yesterday’s video may be next to an old screenshot, making manual browsing chaotic.
Windows does not show all media files: files may appear to be “missing” until the iPhone is unlocked. Other reasons why media files are not displayed:
– Windows only loads part of the structure
– Large videos are not displayed when the connection is weak
– Photos optimized for iCloud are not displayed until they are fully downloaded
So the files exist, Windows just doesn’t show them.Some files are not copied: the familiar device not available error usually occurs in the following cases:
– When transferring large 4K videos or slow-motion videos
– When the phone is locked during transfer
– When the cable connection is interrupted
– When Windows has problems converting HEIC/JPG
Live Photos complicate the situation even further, as they contain two files.USB connection issues: even with a high-quality cable, data transfer can be unstable:
– Slow speed
– iPhone freezing
– Explorer freezing
– Data transfer stopping after a brief disconnect
Modern media libraries are simply too heavy for this old system.No access to albums: DCIM only shows the original camera folders: no favorites, recent, videos, selfies, screenshots, or custom albums. Any organization you’ve set up on your iPhone disappears in Windows.
CopyTrans Studio vs DCIM folder
After using the DCIM folder for a long time, most people come to the same conclusion: accessing your own photos shouldn’t be this difficult. This is why I offer you CopyTrans Studio: not as another tool you have to learn but as a way to finally work with your photos in a way that makes sense.
Instead of struggling with DCIM, CopyTrans Studio accesses your library the way it’s organized on your iPhone. Your albums remain albums. Your edits remain intact. Live Photos remain grouped together, not broken up into separate files. Videos display reliably, rather than disappearing because the USB connection was interrupted at the wrong moment.
- If you don’t have CopyTrans Studio installed, please download it. Download CopyTrans Studio
- Click on the CopyTrans Studio icon. Open the program.
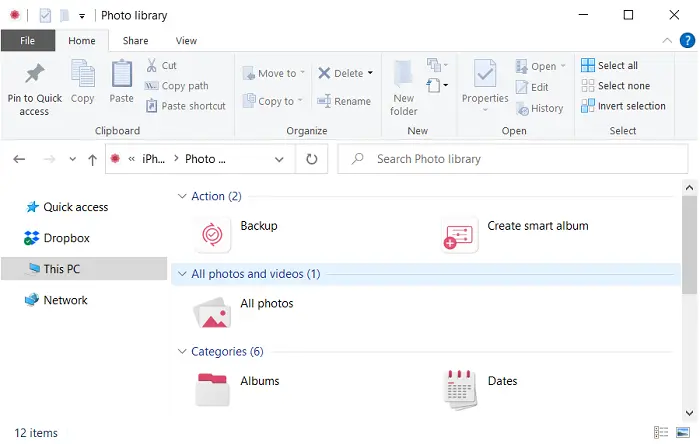
- Select your iPhone and click on “Photo Library”.
- In the CopyTrans Studio main window, you will find different options. Choose the Backup option.
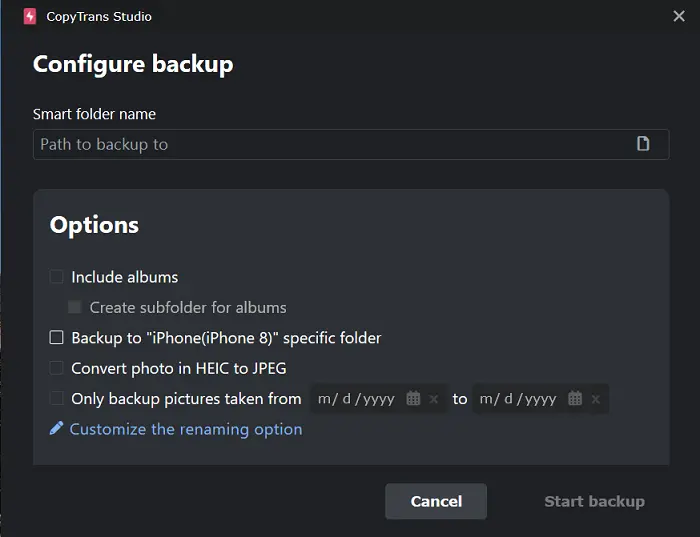
- Now configure your backup.
- And now Start Backup. It will take much less time compared to the full backup.


DCIM Meaning
Final Thoughts
Working with the DCIM folder can feel like you’re constantly one step behind your own photos: searching, guessing, reopening the same folders, and hoping that the file you need will finally appear. It’s a part of the process that most people tolerate rather than truly understand.
But once you say goodbye to DCIM and view your library the way your iPhone already organizes it, everything becomes simple. That’s the experience CopyTrans Studio offers you: your albums, your edits, your videos—everything visible, everything accessible, everything in one place.
So instead of struggling with random APPLE folders or wondering why half of your clips can’t be copied, you get a clear, reliable way to work with your memories. You’ll notice this change immediately the next time you connect your iPhone.