Have you ever tried to save something important on your iPad (a recipe, a chat, or a funny meme), and suddenly realized you don’t know how to take a screenshot on your iPad? Maybe you pressed the wrong buttons, locked the screen, or tried all sorts of gestures, hoping something would work. You are definitely not alone.
The thing is, Apple is constantly improving iPad models — some have a Home button, others don’t — and each one has its own little secret for taking screenshots. In this guide, I’ll walk you through all the possible ways to take a screenshot —with buttons, without buttons, or even with the Apple Pencil, so that next time, you can instantly capture that perfect moment.
- How to Screenshot on iPad?
- How to save Screenshots on PC?
- Screenshot not working on iPad? Troubleshooting tips
- How to take a screenshot on iPad: FAQ
How to Screenshot on iPad?
Taking a screenshot on your iPad is easy, but the exact buttons you need to press depend on your model. The main difference is whether your iPad has a Home button or not. Here is what to do:
For iPads with a Home button
If your iPad still has the classic round Home button, you can take a screenshot as follows:
Open the thing you want to capture
Press the top button and the Home button at the same time
Quickly release both buttons
The screen will flash briefly and you will hear a camera sound (if the volume is turned on). A small preview will appear in the lower left corner – tap on it to make quick edits or share it, or swipe it away to save it directly to the Photos app.
For iPads without a Home button
Newer iPads don’t have a Home button, but the process is just as quick.
Go to the screen you want to capture
Press the top button and the volume up button at the same time
Release both buttons immediately
The screen will flash and you will hear the familiar camera click. You can then tap on the preview to edit, draw on, or crop your screenshot before saving it.
If the buttons are difficult to reach: Use AssistiveTouch.
With AssistiveTouch, you can take screenshots with a simple tap of your finger without having to press any physical buttons.
Go to Settings → Accessibility → Touch → AssistiveTouch
Enable the feature
Tap the floating menu → Device → More → Screenshot
You can even customize the action, for example, set it so that double-tapping or long-pressing the AssistiveTouch icon takes a screenshot. This is especially useful if your buttons are worn out or you simply prefer touch-based shortcuts.
Take a screenshot with Apple Pencil
If you have an Apple Pencil, there’s an even easier way to capture your screen, perfect for students, designers, or anyone who takes notes or draws frequently.
Swipe up from one of the bottom corners of the screen to the center.
Your screenshot will appear immediately and can be marked up or saved. This small gesture ensures an uninterrupted workflow: no buttons, no menus, just a clean capture right where you are.
Save screenshots on PC
With CopyTrans Studio
Now that you know all the ways to capture your iPad screen, whether using buttons, AssistiveTouch, or the Apple Pencil, the next step is to ensure those screenshots don’t get lost in your Photos app. Screenshots are only useful if you can access and organize them when you need them, especially if you want to use them on a larger screen, insert them into a presentation, or back them up securely.
Thw first thought is to transfer images to PC. Moving screenshots from your iPad to a computer may seem difficult at first, especially if you rely on email or iCloud, but there is a faster and more reliable way. With CopyTrans Studio. Let’s take a closer look at how you can save your iPad screenshots to your PC with minimal effort.
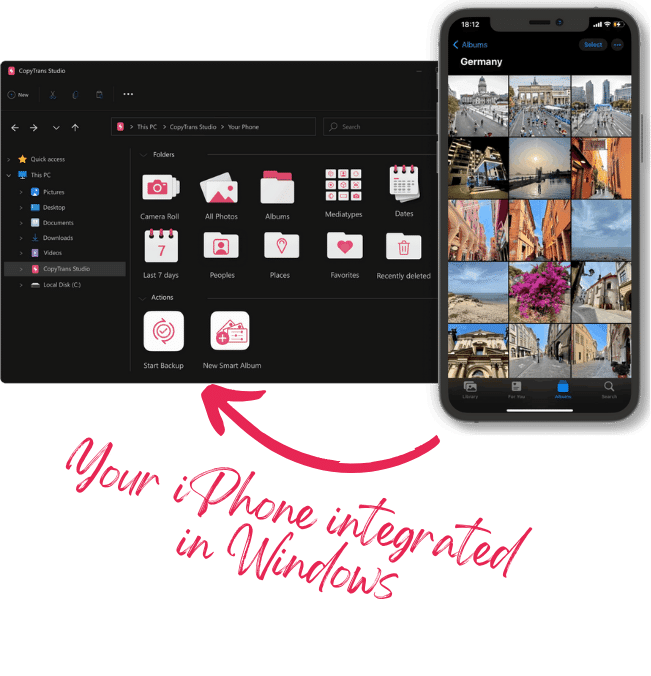
With CopyTrans Studio, you can:
- Transfer photos and videos in one click
- Access your iPhone and iPad Photos as if they were stored on a flash drive
- Organize your photos with Smart Albums
- Say goodbye to HEIC photos and convert them to JPEG
- Connect iPhone to PC via Wi-Fi
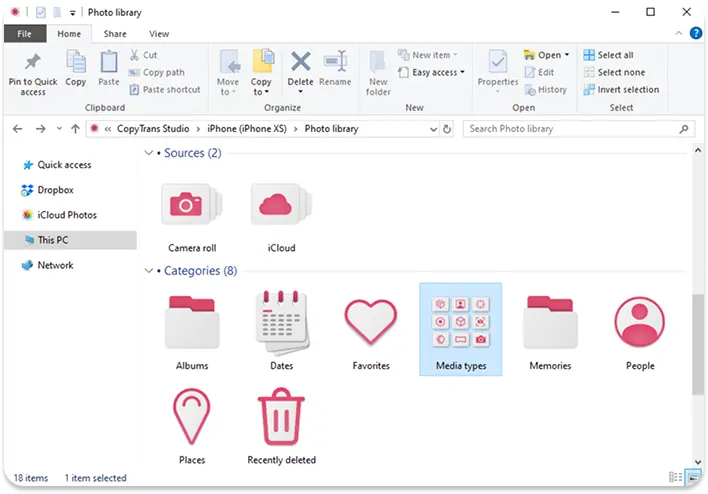
Download and install CopyTrans Studio
Download CopyTrans StudioClick on the CopyTrans Studio icon. Open the program
Choose your iPhone and then click on Photo Library
In the main window, you will see different options. Choose “Media types”
Now open the Screnshots folder and drag-and-drop pictures to your PC, or save the whole folder


Screenshot not working on iPad?
Troubleshooting tips:
If your iPad suddenly stops taking screenshots, it’s usually easy to fix. Here are the most common causes and how to fix them:
The buttons aren’t responding
If pressing the Top and Volume buttons doesn’t take a screenshot, try pressing them simultaneously instead of one after the other. If that doesn’t help, make sure the buttons aren’t stuck or covered by a case. You can also test them by locking the screen or adjusting the volume to make sure they respond properly.
AssistiveTouch is disabled
If you usually take screenshots using AssistiveTouch, go to Settings → Accessibility → Touch Input → AssistiveTouch and make sure it is enabled. You can also re-add the Screenshot action if it is missing from your custom menu.
Your iPad needs a quick restart
Sometimes the simplest solution is the most effective. Restart your iPad to fix minor glitches:
– Press and hold the top button and any volume button until the power slider appears
– Drag the slider to turn off the device
– After a few seconds, press and hold the top button again to turn it back onYour iPadOS may be out of date
If screenshots used to work but suddenly stopped, your system may need an update. Go to Settings → General → Software Update and install all available updates. New versions of iPadOS often fix minor bugs and improve performance.
After trying these steps, your screenshot function should work normally again. If it still doesn’t work, you may need to contact Apple Support, but in most cases, restarting your device or checking your settings will suffice.
How to take a screenshot on iPad
FAQ
Where do screenshots from my iPad go after I take them?
Screenshots are automatically saved to the Screenshots album in the Photos app. You can also find them in the Recent section right after you take them. If you use iCloud Photos, they’ll instantly appear on all your Apple devices.
Can I edit or draw on a screenshot right away?
Yes! After taking a screenshot, a small thumbnail appears in the corner of the screen: tap it to crop, draw, highlight, or add text before saving or sharing. No additional apps are required.
What if I don’t want to use the buttons?
You can opt out of using the buttons entirely. Just turn on AssistiveTouch in Settings → Accessibility → Touch Control. Then set Screenshot as one of the customizable actions — for example, double-tap the floating menu.
Can I take a screenshot of the entire web page, not just what I see?
Yes, if you’re using Safari. After taking a screenshot, tap on the preview and select “Entire Page” at the top. A PDF version of the entire page will be saved, which you can save or share.
Does Apple Pencil work for taking screenshots?
Yes! On iPad models that support Apple Pencil, simply swipe it from any bottom corner of the screen to the center. The screenshot will appear instantly, perfect if you’re already writing or drawing.
Screenshot iPad
Final Thoughts
Knowing how to take a screenshot on your iPad can be useful in more ways than you might expect. Maybe you want to save a recipe before it disappears, capture a map to use offline, or send a quick visual note to a friend, a screenshot handles all of that in seconds. Once you get familiar with the method that suits your iPad model, it becomes a smooth, almost automatic gesture.
Whether you rely on the classic button combination, prefer the ease of AssistiveTouch, or use the Apple Pencil for an even quicker tap — the idea is the same: to capture what’s on your screen without breaking your flow. And that’s the beauty of it, a small trick that quietly makes your iPad experience more effortless and flexible in everyday life.