You’ve recorded something on your iPhone, and the video is way too long. Maybe it starts at 30 seconds with the camera pointed in the wrong direction, or ends with an awkward silence that no one wants to see. Either way, you just want to shorten it without ruining anything.
Shorten videos on iPhone is something most people deal with sooner or later, usually after saving over the original by mistake, or ending up with a blurry mess after sending it to someone. Small things, but frustrating when you didn’t see them coming.
This guide will show you how to shorten videos on your iPhone. Each method is explained in simple steps, without assuming anything you already know. We’ll also cover a few common mistakes along the way, so you don’t have to learn them the hard way.
Choose the method that’s right for you, and you can edit your video in just a few minutes.
- How to shorten a video: Photos App
- How to Trim a Video: iMovie
- Save shorten video on iPhone
- Shorten a video on iPhone: FAQ
How to shorten a video
Via Photos App on iPhone
This is the fastest way to shorten a video on iPhone, and it’s built right into your phone: no additional downloads required. It’s perfect if you want to trim the beginning, end, or both of a clip. Here’s how:
Open the Photos app and find the video you want to trim.
Tap the video to open it, then tap Edit in the upper-right corner.
A yellow timeline with markers on either side will appear at the bottom of the screen. Drag the left marker to cut the beginning, and drag the right marker to cut the end.
Tap the play button to preview the trimmed clip before saving, then tap Done. You’ll have two options—tap Save as New Clip
This last step is important. “Save as New Clip” keeps the original video intact and saves the trimmed version as a separate file. Tapping “Save Video” will overwrite the original and make it irreversible.
One limitation to keep in mind: The Photos app only lets you shorten videos from the beginning and end. If you need to cut something out of the middle of a video, you’ll need iMovie which is discussed below.
How to Trim a Video
Vwith iMovie on iPhone
iMovie is a free Apple app that gives you a little more control than the Photos app. It’s still easy to use and is the best option if you need to remove a section from the middle of a video not just the beginning or end.
Open iMovie and tap the + button to start a new project. Select Movie (not Trailer).
Tap the video you want to edit, then tap Create Movie at the bottom.
Your video will appear in the timeline at the bottom of the screen, tap it to select.
To cut the beginning or end, drag the yellow handles on either side of the clip.
To cut from the middle, scroll the timeline to find the exact spot you want to cut, then tap Actions (the scissors icon) and select Split. This will split the clip into two parts. Repeat the process at the other end of the section you want to delete, then tap the unwanted segment and tap Delete.
When finished, tap Done in the upper left corner, then tap the Share button (square with an arrow) and select Save Video.
iMovie always saves the edited video as a new file, so your original video remains intact. You don’t have to worry about accidentally overwriting anything.
Important to note: iMovie exports the video and saves it back to the Photos app, which can take a minute or two depending on the length and quality of the clip. Just wait until the process is complete before closing the app.
Save shorten video on iPhone
- Start with downloading and installing CopyTrans Studio. Download CopyTrans Studio
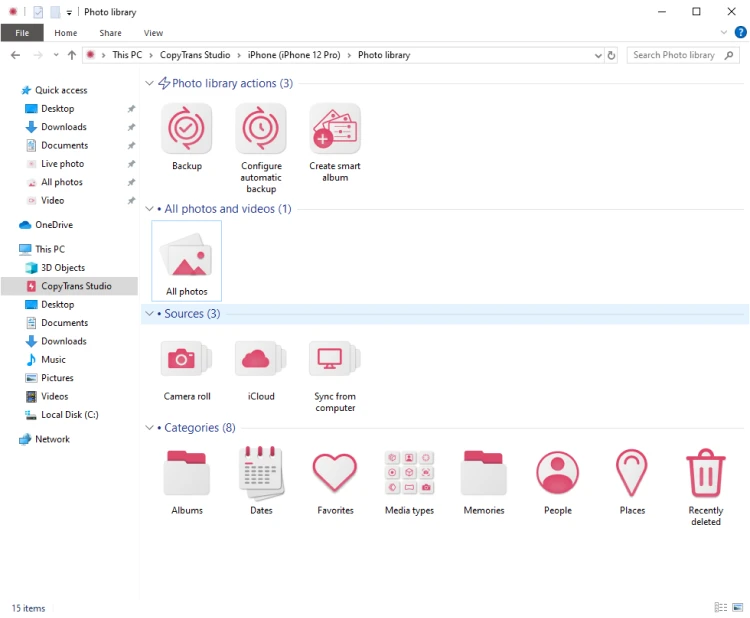
- Click on the CopyTrans Studio icon. Open the program.
- Connect your device to your PC. Double click on to open it. Now, you see the main window and all the options it offers.
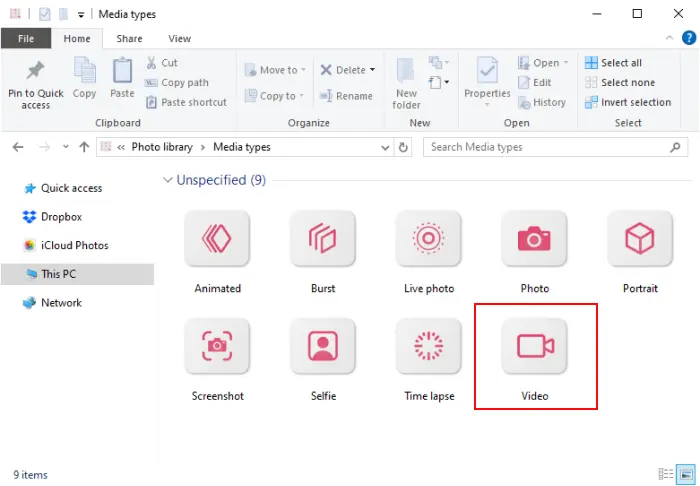
- In the Media Types folder choose the video folder.
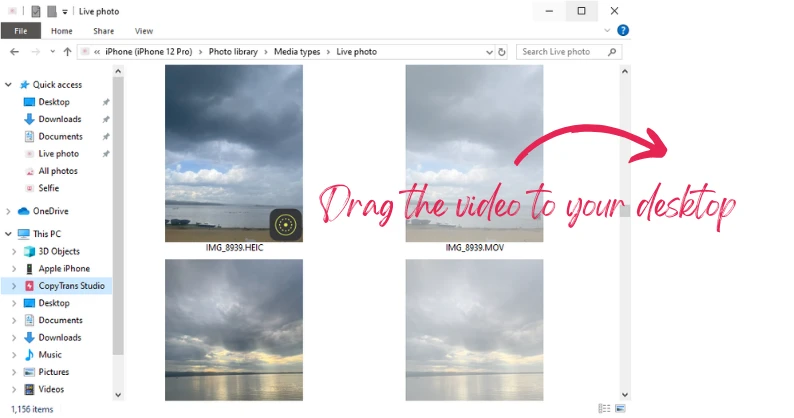
- Now drag and drop the videos to your PC.

You can also do a back up of your Photo Library.
You can also edit videos on your iPhone and then save them to your PC.
Shorten a video on iPhone
FAQ
1. Is it possible to trim a video on iPhone without losing the original?
Yes but only if you do it before tapping “Done” the first time or use the correct method. The Photos app offers a “Save as New Clip” option, which preserves the original file untouched. iMovie always exports a new file, leaving the original intact.
2. Why does a shorten iPhone video look good on the iPhone but blurry when sent to someone else?
Shorten itself doesn’t affect quality, but sending it does. When sending via iMessage, WhatsApp, or email, the app automatically compresses the video to reduce the file size. The recipient sees the compressed version, not the original. To send a shorten video in full quality, use AirDrop, share via a cloud link (iCloud, Google Drive), or first transfer it to a PC using CopyTrans Studio this will preserve the original resolution.
3. Is there a minimum video length after cutting on an iPhone?
Yes, Apple sets a minimum clip length of 0.5 seconds in the Photos app. You can’t shorten a video to a single frame. If you need frame-by-frame precision.
4. I accidentally shorten too much and clicked “Done”, is the video lost forever?
Not necessarily. First, check if iCloud Photos is enabled, if so, the original may sync or be recovered from iCloud.com within a short time. Second, check the “Recently Deleted” album in the Photos app (videos are stored there for 30 days). If neither method works, and you’ve backed up the video to your PC using a tool like CopyTrans Studio, you may still have a complete, unedited version in the Windows folder. This is why regularly backing up videos from your iPhone to your PC is a good habit.
5. Does cutting a video on iPhone affect its metadata (date, location)?
Most tutorials never mention this: when saving a shorten video as a new clip on an iPhone, the creation date is reset to the moment of export, not to the original recording date. GPS location data may also be deleted, depending on the app used and the sharing method. If preserving the original metadata is important (for legal, journalistic, or archival purposes), first transfer the original unedited video to your computer using CopyTrans Studio, which preserves all EXIF data and metadata, and then shorten it using a desktop editor.
How to shorten a video
Final Thoughts
Shortening videos on iPhone is easier than most people think. For quick cutting, just use the built-in Photos app: no downloads, no complicated steps. If you need to cut out a middle section, iMovie is just as easy. Whichever method you choose, always save the shorten video as a new clip to keep the original safe.
Once your videos are exactly how you want them, the next smart step is to transfer them from your iPhone to PC for backup, additional storage, or just peace of mind. That’s where CopyTrans Studio is the best solution comes in. It transfers your iPhone videos to your PC in full original quality, without iTunes, without technical skills, and without the risk of data loss.
Get CopyTrans Studio