Holding old photographs in your hands is a special pleasure: its worn edges, faded colors, and the memories it reveals with just a glance. But photos don’t last forever: they can lose color or clarity, bend, or disappear into the depths of drawers. Gone are the days when scanning a photo meant buying a bulky and expensive scanner or going to a print shop. What we have now is an iPhone, which allows one to scan any photo quickly and efficiently.
More and more people are choosing to scan photos with iPhone not only because of its simplicity but also because of the freedom it offers. You can digitize old photos anywhere – from home, while visiting relatives, or even traveling – and instantly share them with your loved ones or store them securely in the cloud.
If you’ve been wondering how to scan photos on iPhone without buying additional devices or using complicated apps, you’ve come to the right place. Let’s turn those boxes of memories into a beautiful, searchable digital archive starting today.
- Why scan photos with iPhone?
- How to digitize photos: what you need before you start?
- How to scan with iPhone notes?
- How to scan via Files App?
- Transfer scanned photos to PC: with CopyTrans Studio
- Scan photos with iPhone: FAQ
Why scan photos with iPhone?
Before we get into scanning, let’s talk about why to do it. If you’ve got a pile of old photo albums or paper mementos piling up, here are five good reasons to finally give them a digital life – with nothing more than your iPhone.
- Preserve memories before they fade: printed photos and documents get old – colors fade, paper yellows and tears. Scanning with your iPhone helps to preserve clean, high-quality digital versions that won’t deteriorate over time.
- Share instantly with family and friends: want to send a baby picture to a cousin or share your parents’ wedding photo in a family group chat? Scanned images make it easy to reconnect and spread joy with a single touch.
- Create secure digital backups: upload your scanned photos to iCloud, Google Photos, Dropbox – wherever your digital data is stored. That way, even if the originals get damaged or lost, you’ll be sure that they’re backed up and safe.
- Edit and enhance old photos: scanned photos can be brightened, cropped, restored, and even color corrected. You can bring faded prints back to life and make them better than ever.
- Eco-friendly alternative: need a copy of a document or photo? Digital scanning means no extra paper, no mess and no waste. It’s an eco-friendly way to preserve your past.
How to digitize photos?
What you need before you start
Before you start scanning, take a minute to get everything set up properly – it will save you time and greatly improve the quality of your scans. Here’s a quick checklist to make sure you’re ready to go:
iPhone: any iPhone will do, but for best results, use an iPhone 8 or newer model. These models have sharper cameras and access to handy features like Live Text and better low-light performance.
Good lighting: find a spot with soft, natural daylight – by a window, for example. Avoid overhead light or direct sunlight, which can cause glare or harsh shadows.
Flat surface: use a clean, flat surface, such as a table or desk. This will help keep your photos steady and level, which is key to a clean, undistorted scan.
Clean photos (and camera lens): gently wipe printed photos with a soft, dry cloth to remove dust or fingerprints. Do the same with your iPhone camera lens—it makes a bigger difference than you might expect.
Sufficient storage space: scanned photos (especially if you save them in high quality or PDF format) can take up more space than regular images. Make sure you have several hundred megabytes of free space so that nothing interrupts the scanning process.
With this simple setup, you’ll be able to scan like a pro without any additional gadgets.
How to scan with iPhone notes?
If you’ve never tried using the Notes app as a scanner, now’s the time. This built-in iPhone feature is one of the easiest and most underrated ways to digitize old photos, especially if you need quick results without having to download something new.
Why use the Notes app?
✅ It’s already installed – no need to download anything.
✅ It automatically detects edges and improves image quality.
✅ You can crop, correct and quickly save or share your scans.
Although Notes is designed for documents, it’s surprisingly good for scanning printed photos – especially when you just need a quick and clean digital copy. Here is how to scan with iPhone Notes:
- Open the Notes app and create a new note.
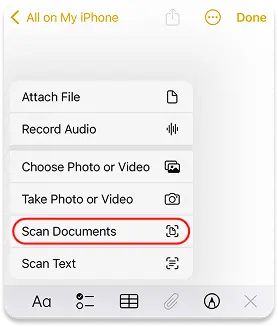
- Tap the paper clip icon above the keyboard. Select “Scan Documents”.
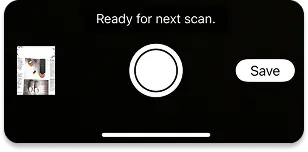
- Position the photo in the camera frame. The app will automatically capture the image when it detects the edges, or you can press the shutter manually. Adjust the scan by dragging the corners to fit your photo.
- Scan additional photos if necessary, or click “Save” when you’re done.
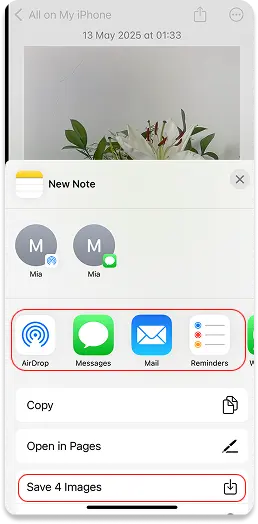
- You can then share your scan, save it to “Files”, add it to “Photos” or email it.
Whether it’s a single photo or a whole stack, the Notes app turns your iPhone into a pocket scanner – fast, effortless and completely free. Perfect for beginners or those who want to go hassle-free.
How to scan using an iPhone?
Via Files App
Looking for an easy way to scan and organize photos right on your iPhone? The Files App has built-in features that make it easy to scan and manage your images – especially if you already use iCloud or local folders to store your media files.
Why use the Files app?
✅ Save scans directly to iCloud Drive or local iPhone storage.
✅ Built-in tools for cropping, markup and filters
These apps are great if you want to keep everything in one place, but have a little more flexibility to save and edit scans. Here is how to scan using the Files app:
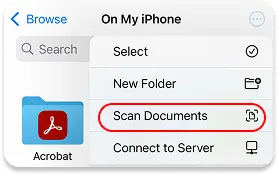
- Open the Files app. Tap the three-dot icon in the upper-right corner, and select “Scan Documents”.
- Position the photo and take a picture with the camera. Make other changes if needed, and then click Save.
- The scanned documents will be saved directly to the selected folder – either on your device or in iCloud Drive.
Tips for getting the best quality scans
Want to get sharp and vivid pictures? Here are some simple but effective tips to help you get the best results from your iPhone:
📸 Use natural light: position yourself by a window with soft, indirect daylight. Avoid harsh overhead lighting or flash – both can cause glare and shadows.
🧼 Clean your camera lens: even the smallest smudge can ruin a picture. Quickly wipe the lens with a soft cloth before starting work.
🎨 Use a contrasting background: put light-colored photos on a dark surface and dark-colored photos on a light-colored surface. This will help your iPhone detect edges more accurately.
📏 Hold your phone parallel: hold your iPhone directly over the photo and align it carefully. Turn on grid mode in Settings > Camera > Grid to keep everything level and centered.
🖐 Take your time: a little patience won’t hurt. Adjust the angle and lighting if necessary – these small changes can make a big difference to the quality of your scan.
Transfer scanned photos to PC
With CopyTrans Studio
If you decided to scan photos just with you camera and they are saved directly to your Photos App, then the next smart step is to organize and back them up to your PC – and that’s exactly what CopyTrans Studio can help you do. It is a program for Windows PC that makes transferring photos from your iPhone to your computer simple and fast. You don’t have to rely on iCloud or worry about storage limits. Just connect your iPhone, select your photos (including the ones you just scanned) and transfer them to your computer in a few clicks.
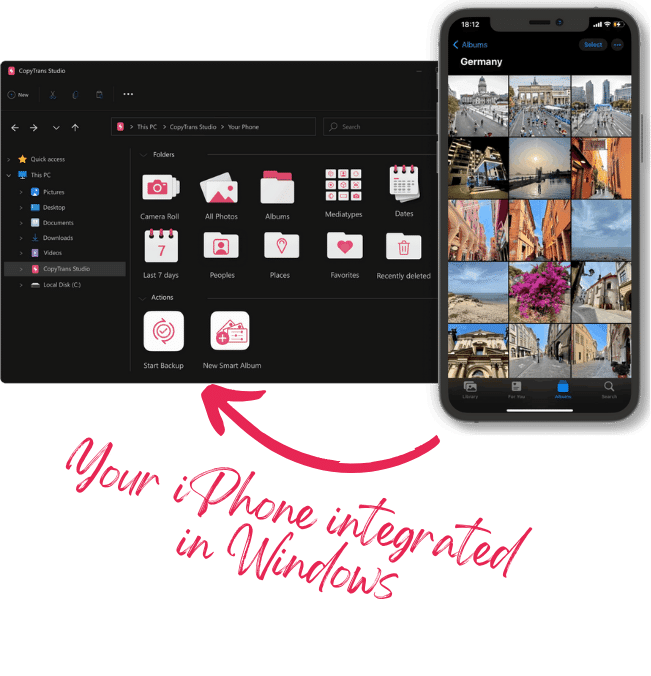
With CopyTrans Studio, you can:
- Transfer photos and videos in one click
- Access your iPhone and iPad Photos as if they were stored on a flash drive
- Organize your photos with Smart Albums
- Say goodbye to HEIC photos and convert them to JPEG
- Connect iPhone to PC via Wi-Fi
Download and install CopyTrans Studio.
Download CopyTrans StudioClick on the CopyTrans Studio icon. Open the program.
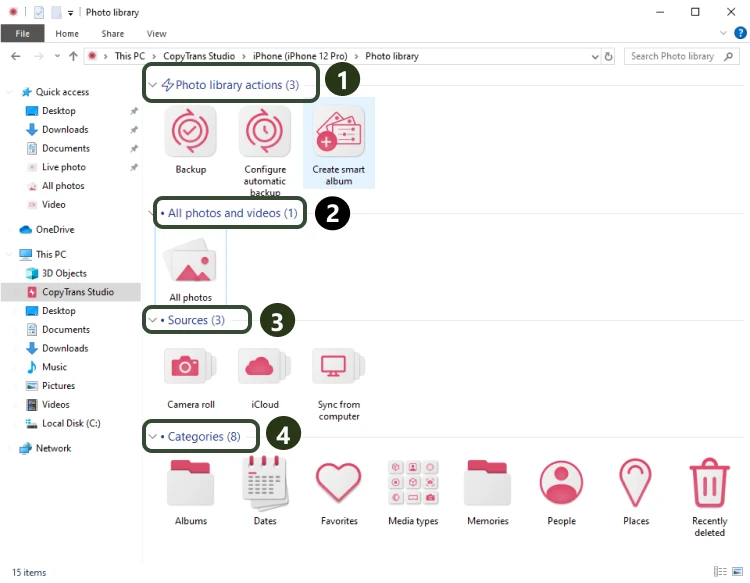
Choose your iPhone and then click on Photo Library.
When you open the main window, you’ll see a few options to move your photos. Just pick whatever seems easiest to you:
Option 1: Back up your entire photo library with one click. Note: The app is smart enough to skip duplicates, so you won’t end up with double files.
Option 2: Go into the “All Photos” folder and pick the pictures you want to copy over manually.
Option 3: Choose whether you want to copy photos from your iPhone or from iCloud: it’s up to you.
Option 4: Want more control? You can drag and drop photos by category and organize them your way.
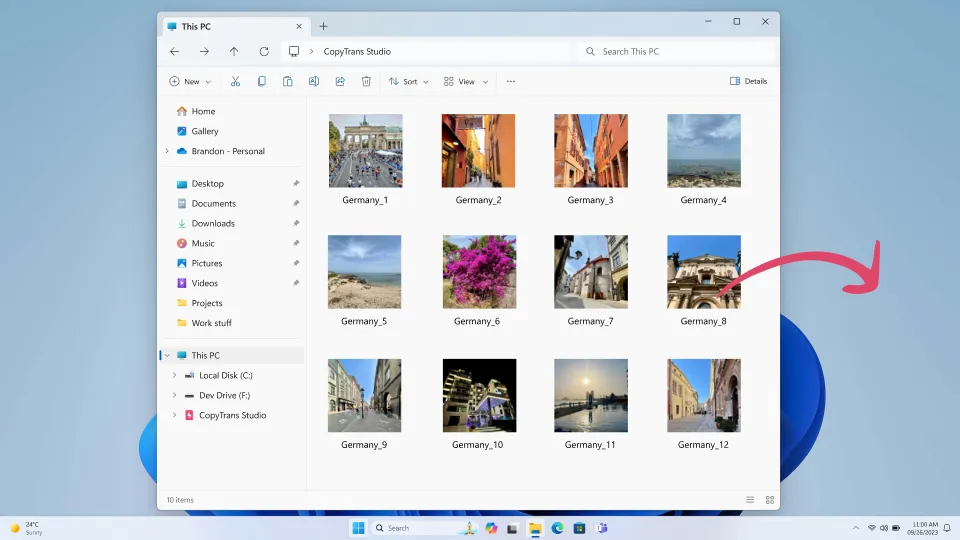
- Now, drag-and-drop photos to your PC.


If you would like to edit the photos before the transfer, then use our detailed guide on how to do it better.
Scan photos with iPhone
FAQ
Can I scan multiple photos at the same time with my iPhone?
Yes, you can scan multiple photos in one session using Notes or similar tools. But to get better quality and easily crop or edit the scan, it’s better to scan one photo at a time.
Is scanning better than simply taking a photo?
Absolutely. Scanning flattens the image, avoids perspective distortion, and reduces glare. Many scanning tools also automatically crop edges and adjust contrast for a cleaner result.
What’s the best free photo scanning app for iPhone?
For quick and easy scanning, the built-in Notes app is great. But if you need more control and photo-specific features, try Google PhotoScan or Adobe Scan – they’re free and designed for sharper scanning.
Can you scan glossy or delicate photos without glare?
Yes, but lighting matters. Avoid overhead lights and direct flashes. Use soft natural light and tilt your iPhone slightly to reduce reflections. A matte surface behind the photo also helps.
Can I scan drawings, documents, or handwritten notes?
Definitely! The same scanning actions apply to children’s drawings, typed letters, or handwritten recipes. And if you’re using iOS 15 or later, Live Text even lets you copy or translate printed and handwritten text directly from the scan.
Will scans take up a lot of space on my iPhone?
High-quality scans can take up more storage space, especially if you’re scanning a lot of photos. To avoid filling up your phone, you can transfer them to your computer or external drive with CopyTrans Studio or store them in iCloud, Google Drive, or Dropbox.
How to scan on iPhone
Final Thoughts
How do I scan photos on my iPhone? There are no complicated steps. Just your device, some light, and a few spare minutes. We’ve shown you two easy ways:
- Using the Notes app for fast, high-quality scanning with built-in organization.
- Use the Files or Photos app to easily store, customize, and sort your scanned images.
And when it’s time to transfer these digital treasures to your computer – for backup, editing, or sharing – CopyTrans Studio is your best solution. It’s fast, reliable, and will help you keep your photo archive intact without the need for iCloud or complicated synchronization.
So, if you’ve been putting off digitalizing your old photos all the time, now is the time to start. In this article, you’ll find everything you need to get started – step-by-step and stress-free.
👉 Scan. Save. Share. Smile.