Trying to snap a group photo but someone always ends up missing? Or maybe you’ve balanced your phone on a stack of books, racing to get in frame before the shutter clicks. The iPhone photo timer fixes all of that. It’s a simple tool that lets you take photos without touching a thing, perfect for hands-free selfies, group shots, or any moment when you want to be in the frame and in control.
In this article, we’ll show you how to set a photo timer on iPhone, walk you through the process step-by-step, and provide some expert tips on making the most of this handy feature. You’ll be amazed at the creative possibilities that open up once you know how to use the iPhone camera timer effectively.
- Photo Timer on iPhone
- How to do a timed photo on iPhone?
- Timed Photo Tips: Make Your Shots Look Better
- What to do if the iPhone photo timer is missing or not working
- How to save timed photos on PC?
- Timed photos on iPhone: FAQ
Photo Timer on iPhone
The iPhone photo timer is a built-in feature that delays the capture of a photo, giving you a few seconds to get into position. It’s ideal for solo shots, group photos, and even capturing motion shots when you need some extra time.
3-Second vs 5-second delay vs 10-Second Delay
You can choose between a 3-second delay, 5-second delay or a 10-second delay on your timer, depending on how much time you need to get ready for your shot. A 3-second delay is great for quick solo selfies, while the 10-second delay is perfect for group shots, action photos, or when you need a little extra time to get into position. A 5-second delay feels like Apple’s sweet spot, quick, but still enough time to get in position and look your best.
Use Cases for the Camera Timer
- Solo shots: Say goodbye to awkward, outstretched-arm selfies. Set the timer, take a breath, and snap a photo that actually feels like you.
- Group photos: Everyone gets to be in the picture, no need to hand your phone to a stranger or run back into frame.
- Tripod photography: Ideal when you’ve got your phone on a tripod and want a few seconds to get into place before the shot.
- Action shots: Great for capturing motion, jump, spin, dance, or move freely without worrying about hitting the button in time.
How to do a timed photo on iPhone?
It’s easier than you think to set the timer on your iPhone. Here’s a quick guide to help you get started:
- Open the Camera app. Tap the arrow at the top (or swipe up) to reveal the hidden options for your camera settings.
- You’ll see a small clock icon, which is the photo timer option.
- Select the delay you prefer, 3 seconds, 5 seconds or 10 seconds
- Once you tap the shutter, you’ll have time to get ready for your perfect photo.

Important Notes:
- The timer works in Photo and Portrait modes, but not in Video or Slo-mo.
- Live Photos and Burst Mode are great options for dynamic shots or moving subjects, though they’ll capture multiple frames.
Timed Photo Tips: Make Your Shots Look Better
Now that you know how it works, let’s talk about a few tricks that’ll help your timed photos look even better.
- Use a Tripod or Stable Surface:
To ensure your photos come out sharp and stable, use a tripod or place your iPhone on a stable surface. This eliminates the risk of shaky images and ensures your photos look crisp, even if you’re using the 10-second delay. - Use the 10-Second Delay for More Time to Get Into Position:
If you’re shooting a group photo or need extra time to set up, choose the 10-second delay. This gives you plenty of time to adjust your pose, get everyone in position, or move into frame if you’re shooting solo. - Frame the Shot Beforehand:
It’s important to think about the composition of your shot before you tap the shutter. Take a moment to check the background, lighting, and framing. This will make it much easier to step into place and ensure your photo is well-composed. - Use Portrait Mode for More Professional Results:
For a more professional-looking photo, try using Portrait Mode. This mode creates a beautifully blurred background (bokeh effect), making you or your subject stand out in sharp focus. It’s perfect for both solo and group shots. - Use Live Photos or Burst Mode for Moving Subjects:
If you’re capturing an action shot or a moving subject, Live Photos or Burst Mode are great choices. Live Photos capture a few seconds of movement before and after your photo, while Burst Mode takes multiple photos in quick succession. This gives you the best chance to capture the perfect shot of a moving subject.
What to do if the iPhone photo timer is missing or not working
Sometimes, a photo timer on iPhone is not showing or doesn’t work properly. Don’t worry, there are a few things you can try:
- Try Restarting the Camera App
- Reboot Your iPhone for a Fresh Start
- Update iOS
- Confirm You’re in Photo/Portrait Mode (Not Video or Slo-mo)
- Reset All Device Settings
If the timer is missing or not working, try closing and reopening the Camera app. This often resolves any minor glitches.
If there are some minor issues, then just restarting your iPhone could be an easy solution
Ensure your iPhone is running the latest version of iOS. Sometimes, bugs that affect the timer feature are fixed in software updates. Check for updates in Settings > General > Software Update.
The timer only works in Photo or Portrait mode, so make sure you’re not in Video or Slo-mo mode. The timer icon won’t show in those modes.
As a last resort, reset all settings on your iPhone. This won’t erase data but will revert settings like Wi-Fi and display preferences: go to Settings > General > Transfer or Reset iPhone > Reset > Reset All Settings.
How to save timed photos on PC
You’ve figured out how to use the iPhone timer, and just like that, you’ve got your hands back in the frame. No awkward arm stretch, no “Can you take a quick photo of us?” Just you, your people, and the perfect moment, captured exactly how you imagined it.
Now comes one more important part , getting those shots off your phone and onto your computer without turning it into a whole project. That’s where CopyTrans Studio helps you.
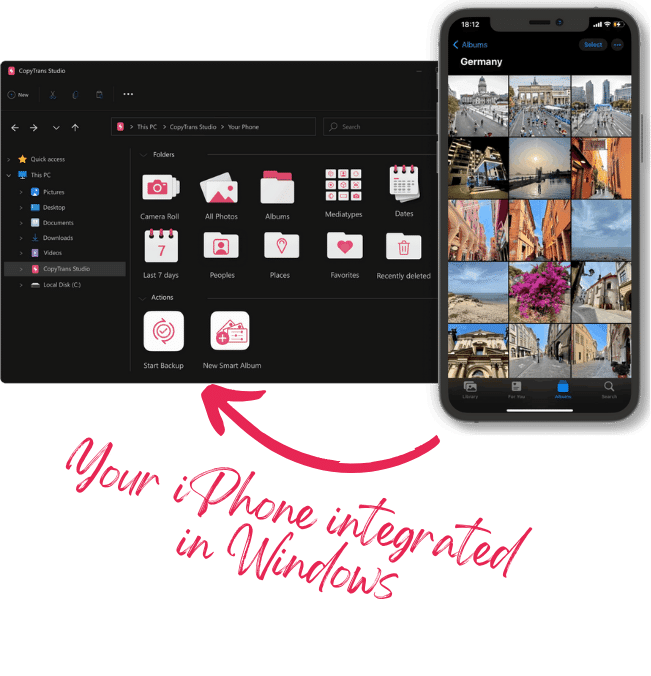
With CopyTrans Studio, you can:
- Transfer photos and videos in one click
- Access your iPhone and iPad Photos as if they were stored on a flash drive
- Organize your photos with Smart Albums
- Say goodbye to HEIC photos and convert them to JPEG
- Connect iPhone to PC via Wi-Fi
Download and install CopyTrans Studio.
Download CopyTrans StudioClick on the CopyTrans Studio icon. Open the program.
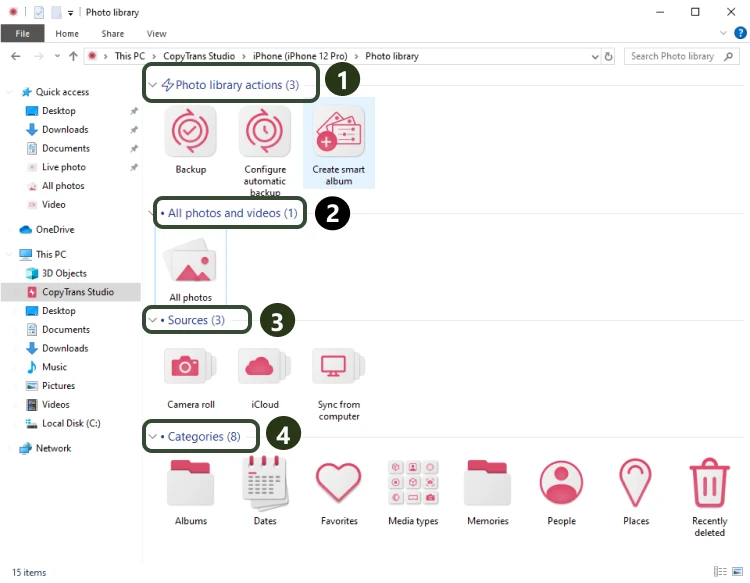
Choose your iPhone and then click on Photo Library.
In the main window, you will see different options:
Option 1: backup the whole library in one click. Note: it does incremental backups without duplicates.
Option 2: open the “All photos” folder and copy images manually to the PC.
Option 3: choose between iPhone and iCloud photos.
Option 4: drag-and-drop photos separately by categories.
- Now drag-and-drop photos to your PC.


Bonus: Can You Take Timed Photos on iPhone Using Siri or Apple Watch?
If you want even more flexibility, you can use Siri or your Apple Watch to take timed photos.
- Use Apple Watch as a Remote Camera Shutter
With the Camera Remote app on your Apple Watch, you can trigger your iPhone’s shutter remotely. While it won’t automatically start the timer, you can use the timer with the Watch to set up your shot and then trigger it hands-free. - Use Siri to Open the Camera App
Siri can help you quickly open the Camera app, but it can’t start the timer directly. You’ll still need to manually tap the timer icon once the app is open. - Shortcuts as a Workaround
For advanced users, the Shortcuts app allows you to automate tasks. You can create a custom shortcut to open the Camera app and set the timer automatically, making it a fully hands-free experience.
Timed photos on iPhone
FAQ
Can I use the photo timer in Portrait mode?
Yes! The timer works beautifully in Portrait mode, allowing you to take stunning, depth-effect photos without needing to press the shutter. This is great for hands-free solo shots or group portraits where you want that pro-looking background blur (also known as bokeh).
Can I take a burst of photos with the timer?
No, the iPhone timer only takes a single photo after the countdown ends. However, if you want multiple shots, you can use Burst Mode manually (by holding the shutter button) or switch to Live Photos, which captures a few seconds of movement around your shot.
Why are my timed photos blurry or out of focus?
This often happens if your phone isn’t perfectly stable. Try using a tripod or propping your phone on a firm surface. Also, make sure you tap to focus before setting the timer, especially in low-light conditions where the camera might struggle to lock onto a subject. More detailes you can find in our guide on how to take professional photos with iPhone.
Does the iPhone timer work in video mode?
No, the built-in photo timer on iPhone only works for photos, not for videos. If you want to record a video hands-free, you can use the red shutter button and quickly step into the frame, or better yet, use the Record button on your Apple Watch or a Bluetooth remote. Another workaround is using the iPhone’s Voice Control feature, once it’s enabled in Settings, you can say “Start recording” after opening the Camera app in Video mode.
iPhone photo timer
Now that you know how to take a timed photo on iPhone, you’re not just snapping pics, you’re unlocking a whole new level of creative freedom. From group shots to artistic self-portraits, the iPhone timer turns your camera into a silent, patient photographer that waits for you to be ready. No more cropping yourself in, asking strangers to take the shot, or rushing against the clock.
The next time you reach for your phone, remember this: your iPhone isn’t just smart, it’s ready to help you nail the perfect shot, every single time. All you have to do is that iPhone photo timer, strike your pose, and let the magic happen.
And if you ever find yourself struggling with managing or transferring those perfect shots to your computer, that’s where CopyTrans Studio come in. Our tools are built to make your photo journey smoother, helping you seamlessly transfer, organize, and back up your iPhone photos with zero hassle.
So next time you’re setting up that perfect shot, remember, you’ve got time on your side.