Do you remember that feeling when you go to the countryside and see a beautiful night sky full of stars there? It is a breathtaking view, and I’m sure you want to save this in your memory and capture it on your smartphone. So, you pull out your iPhone, take a picture of the stars and… fail! The worst photo you’ve ever taken! If you feel this pain, then I’m ready to help you out!
The camera has been improved in the latest iPhone models. It means that you can now take incredible and high-quality pictures of the starry sky. The most important is to set up the right settings. In this article, I will tell you how to make beautiful shots, as well as how to save these photos on your computer in just a couple of clicks.
- How to take photos of stars on iPhone
- Photos of stars: save photos on PC
- How to take photos of stars
How to take photos of stars on iPhone
Location Matters
To get clear images of stars, find a location away from light pollution. Rural areas with minimal light sources are ideal for astrophotography. Choose a clear, moonless night to get the best conditions.
Prepare Your iPhone
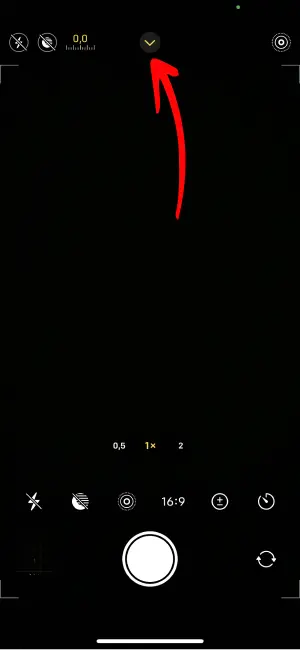
- Adjust Settings: Open the Camera app on your iPhone and access the settings. Switch to manual mode. The most crucial settings to adjust are exposure, Night Mode, and focus.
- Turn off Flash: Make sure that the flash is turned off to prevent any artificial light from interfering with your long-exposure shots.
Setting Up Your Shot
- Use a Tripod: For stable, long-exposure shots, mount your iPhone on a tripod. If you do not have a tripod, lean the phone against a stable surface to avoid camera shake.
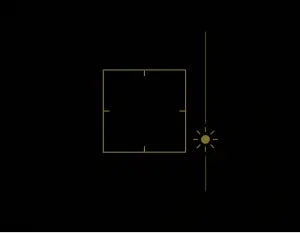
- Focusing: Set the focus on the sky and fix it by long-pressing the focus point on the screen.
- Do not use digital zoom: digital zoom drastically reduces the quality of the photo, making it noisy and pixelated.
Adjust Your Settings
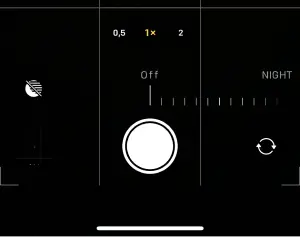
- Night Mode: Use Night Mode on your iPhone. It is enabled automatically. You can also adjust the settings.
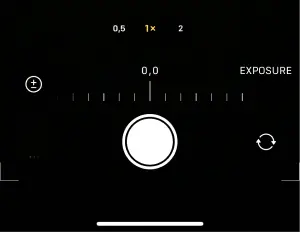
- Exposure: Start with a lower exposure and adjust it as you wish. Longer exposures can capture more stars, but may also introduce motion blur from the earth’s rotation.
- Brightness: you can change the brightness of the photo to make it look better.
Post-Processing
After taking the picture, use photo editing applications to improve the results. To make your photos better, adjust brightness, contrast, and sharpness. You can find more information in our guide on how to edit photos on iPhone.
Take Pictures of stars
Best Practices vs. Common Mistakes
Photos of stars
Transfer photos from iPhone to PC
Now, when you are done with the photos, I suggest you save these photos to your PC. That way, they will be safe and easily accessible. CopyTrans Studio is the best solution!

With CopyTrans Studio, you can:
- Transfer photos and videos in one click
- Access your iPhone and iPad Photos as if they were stored on a flash drive
- Organize your photos with Smart Albums
- Say goodbye to HEIC photos and convert them to JPEG
- Connect iPhone to PC via Wi-Fi
- Download CopyTrans Studio and install it. Download CopyTrans Studio
- Click on the CopyTrans Studio icon. Open the program.
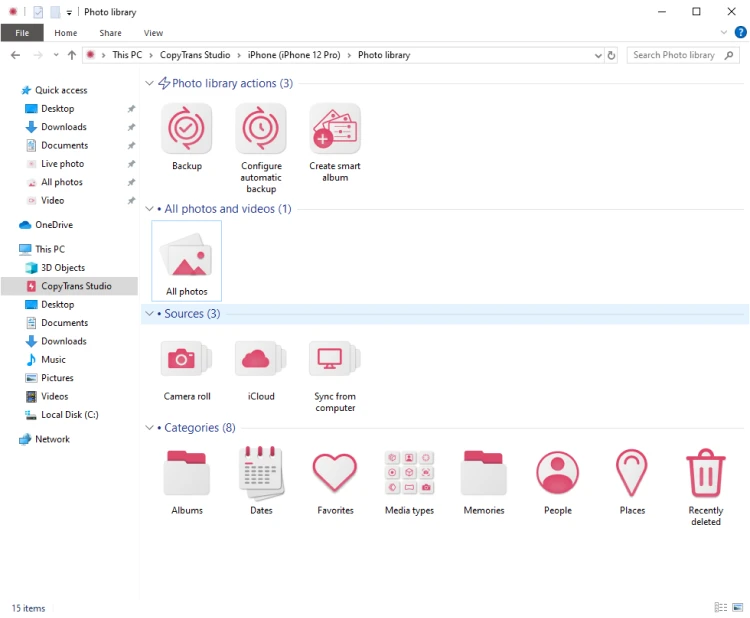
- Select your iPhone and click on “Photo Library”.
- You have different ways to find the photo:
- After you chose the photos of the night sky, drag-and-drop them to your PC.


More guides on how to use CopyTrans Studio:
How to take photos of stars
FAQ
What is the best iPhone model for taking night sky photos?
The best models for night sky photography are iPhone 11 and the models that follow, up to iPhone 16 Pro. These models come with enhanced night mode capabilities, which significantly improve the performance in low-light conditions. The night mode icon automatically appears in the native camera app when the lighting is dim, allowing you to easily capture stunning night sky photos.
How do I enable Night Mode on my iPhone camera?
To enable Night Mode on your iPhone, make sure you have iPhone 11 or a newer model, as older models do not have this feature. Open the Camera App, and if the lighting conditions are low enough, the Night Mode icon (which looks like a crescent moon) will appear at the top of the screen. Tap the Night Mode icon to turn it on, and you can adjust the exposure time slider to increase the time your camera captures light for your night sky photos.
What is the best way to take night sky photos using my iPhone?
The best way to take night sky photos with your iPhone includes several steps. First, find a dark location to minimize light pollution. Set up your iPhone on a tripod to avoid camera shakes. Open the Camera App and enable Night Mode. Adjust the exposure time to around 30 seconds for optimal results. Use the shutter button to capture your photo while keeping your iPhone still.
Can I use my iPhone to capture the Milky Way?
Yes, you can absolutely use your iPhone to capture the Milky Way. For the best results, choose a location away from city lights. Use Night Mode on your iPhone and make sure to put your iPhone on a tripod for stability. Set the exposure time for 30 seconds to capture enough light. This will help you to photograph the Milky Way clearly.
How to take pictures of stars on iPhone
Conclusion
With the right technique and a little bit of experimentation, you can take stunning photos of the stars with your iPhone. Whether you’re capturing the vastness of the Milky Way or the beauty of a night sky full of stars, astrophotography on the iPhone can produce truly mesmerizing results. So grab your iPhone, find a scenic spot and let the wonders of the night sky come alive in your photos.
Remember, patience and perseverance are the keys to night photography. Enjoy the process of capturing the beauty of the space and let your iPhone unleash your creativity under the stars.