Recently, I had to back up my iPhone photos. So I tried different wireless ways to do that, but something would always go wrong!
First, I installed Google Photos on my iPhone. It took me a while to figure out how to sync everything. And in the end, I found out that half of my pics were corrupted! So, I simply wasted my time…
I also tried to send photos to myself on WhatsApp and Telegram. I then opened the Web version of the messengers to download the pics to the PC. And in fact, it is a nice option if one needs to copy a few photos. But it’s not good for transferring a lot of pics at once!
And I don’t want to upload my photos to iCloud because I’m concerned for my privacy, and I don’t wish to pay for the storage. So I started to look for a way to transfer photos from iPhone with USB.
Here are the solutions I found. You can use them if you wish to manually select photos to transfer or to make a full backup of your iPhone Photo Library in one go:
Windows cannot play iPhone videos. See how to play .mov files on Windows.
How to transfer photos from iPhone to USB?
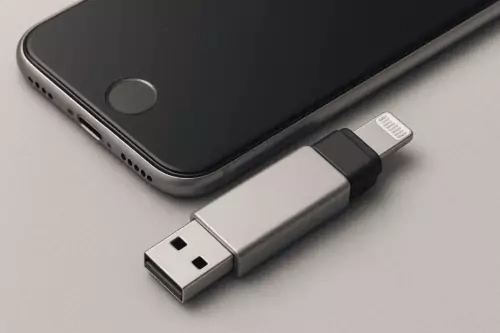
Yes, there are USB drives designed just for iPhones.
They are available with either a Lightning (the usual cable for PCs) or USB-C (an oval one) connector. You can transfer photos, videos, and large files from your iPhone to such drives. Another advantage is the possibility to view files directly on the iPhone in a dedicated app.
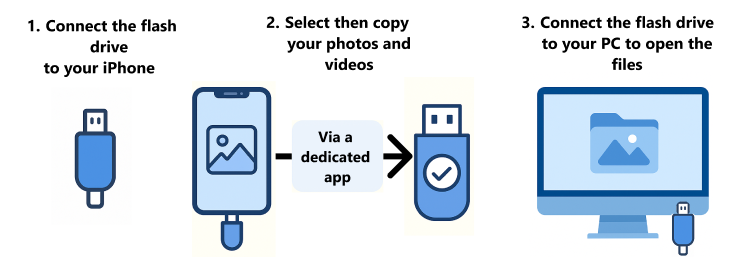
How to use the USB drives for iPhone?
An iPhone USB drive plugs directly into the iPhone Once connected, an app associated with the drive (for example, SanDisk Memory Zone for the SanDisk iXpand USB drive recommended by Apple) opens. You select your photos or videos and copy them to the drive in the app. You can then unplug the flash drive and connect it to your PC, view the files on the computer.
Here’s my feedback. Such USB drives are very handy for quickly freeing up memory. I like that I can plug mine into my PC, iPad, or iPhone.
But there are some limitations. For example, the app I used wasn’t very intuitive, so it was difficult to explain to my grandmother, for whom I had bought the drive, how to open the app and then Files to copy the photos.
- Instant transfer of photos, videos, and large files.
- No internet connection needed.
- Requires using an app, which isn’t always intuitive.
- Transfer speed varies depending on the model.
- Best compatibility with iOS 13 or later.
- Some formats are not handled well (HEIC, 4K videos, Live Photos).
How to transfer iPhone photos to an external hard drive?
With a multifunctional photo app
The best way to transfer photos from an iPhone to an external hard drive is to do it via a PC. The software program for Windows I recommend is called CopyTrans Studio (What is CopyTrans Studio?). It’s a brand-new app developed by a Swiss company, CopyTrans. You simply need to install it on your Windows PC and then connect your iPhone to the computer with a USB cable.
The free version of the software offers 3 full Photo Library backups a day. However, drag-and-drop of photos is limited to 50 files a day in the free version.
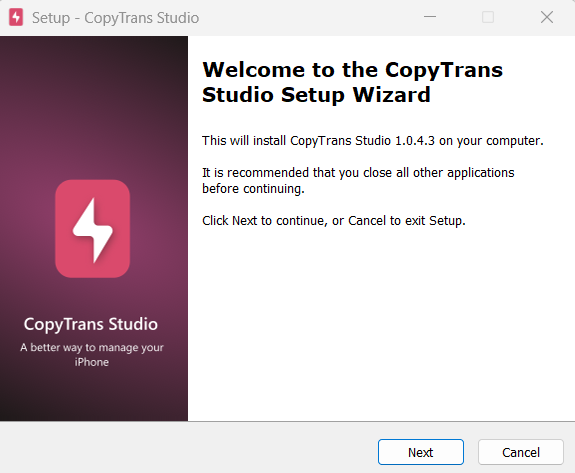
- Install the program on your Windows PC as you usually install other apps. Refer to the setup guide if necessary. Download CopyTrans Studio for Windows
- Launch the app and connect your iPhone to the PC with a USB or a Type-C cable.
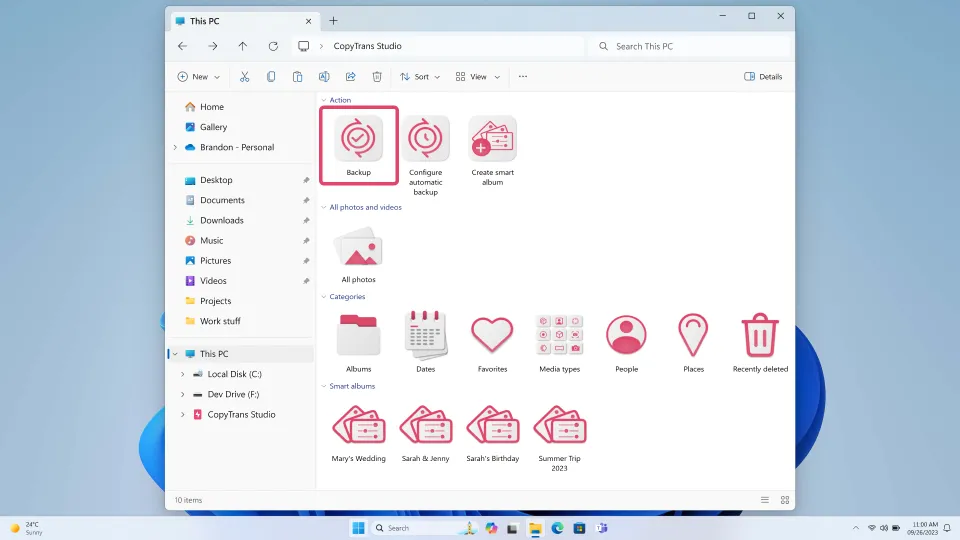
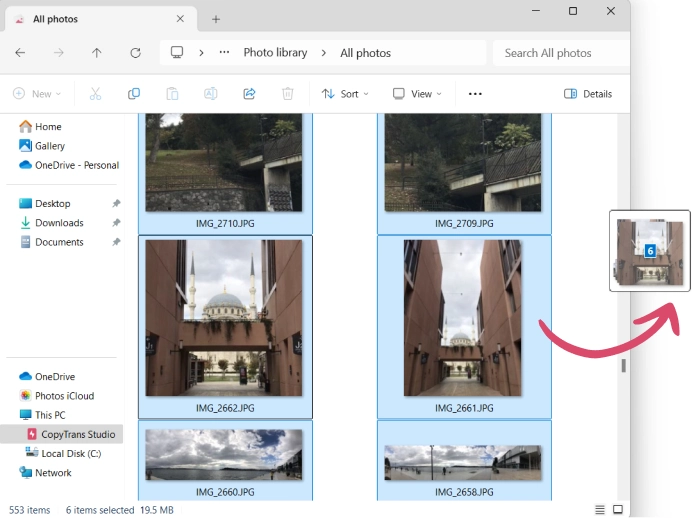
- Open any folder on your PC. You will see CopyTrans Studio in the left menu under the “This PC” folder.
- You can now click the “Backup” button and copy your entire photo library to a folder on your PC, even to an external hard drive (see how to transfer photos from iPhone to an external hard drive).

 Otherwise, select photos in an album and drag and drop them to the PC.

- Full photo backup in a few clicks to the destination of your choice
- Installed on your PC – nothing is installed on your phone
- Transfer photos in the original Apple format (HEIC) or convert them automatically to .JPG
- Delete your iPhone photos and videos
- Drag-and-drop is limited in the free version. A monthly subscription is at 4.99 USD.
In the next paragraph, I’ll review native Windows solutions that are also free. They are not that intuitive or straightforward, though. But if you don’t want to install anything on your PC, there are only 2 possible options.
Transfer photos from iPhone to PC for free and without apps?
Native Windows solution – manually select photos
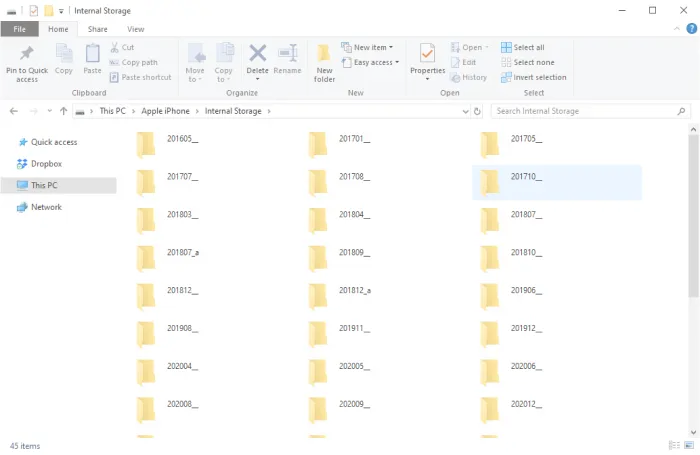
- To transfer iPhone photos to the PC with a USB cable, open a folder on your computer.
- In the left navigation panel, click on “This PC”, then on your iPhone. The folders are sorted by date – you can see a year and then a month.
What to do if the PC doesn’t recognize my iPhone? - You can now open the folders to find your pics and drag and drop them to your PC or a USB drive.
- Free
- Automatic conversion to a Windows-compatible format
- Delete your iPhone photos and videos
- No assistance if you need help
- You have to manually find the photos to transfer
If you want to copy your entire photo library to your PC in one go and for free, I’ll show you how to in the next paragraph.
Full Windows Photo Backup
This method is convenient if you’re not picky. All the photos will be placed in one folder, but you will still be able to sort the photos by date or name.
On my side, all the vertical photos and horizontal ones that I took upside-down were flipped. So I had to flip them back manually one by one. If you’re ready for that, here are the steps to follow.
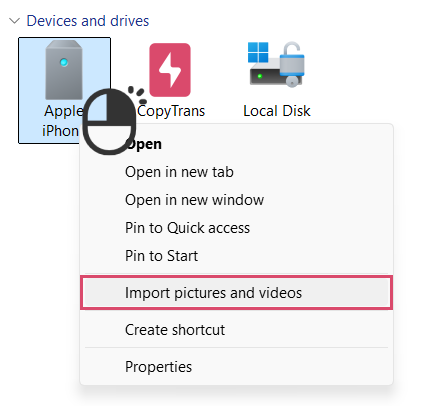
- Open a folder on your PC and connect your iPhone with a USB or a Type-C cable.
- In the left navigation panel, open “This PC”. Then right-click on your iPhone icon. Select “Import pictures and videos”.
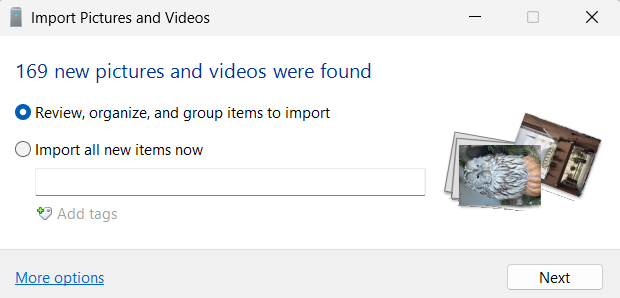
- If you choose “Review, organize, and group items to import”, you’ll be able to select photos to copy over to the PC.
Otherwise, you can make a full photo backup if you click on “Import all new items now”. - All the files are placed in the default Windows folders “Pictures” and “Videos”. The name of the folder is the current date.
- Free
- Makes a photo backup in a few clicks
- Automatic conversion to a Windows-compatible format
- No assistance if you need help
- Photos can be flipped
Conclusion
CopyTrans Studio is the most efficient solution among all the described ones (see the steps to follow above). The software comes in handy when you need to transfer your photos from an iPhone to a PC or a USB drive with a cable or to copy the whole photo library in one go. No need to open dozens of folders to find a single picture, in comparison to the native free solutions.
CopyTrans Studio also helped me to :
- Clear my Photo Library;
- View my iPhone videos and photos on Windows;
- And even transfer photos from my iPhone to my computer/ USB Drive wirelessly after the first wired connection!
You can download CopyTrans Studio from the official page or check the users reviews.
Related articles
- How to activate the “Delete iPhone photos” function in CopyTrans Studio?
- Family Vacation Photos: how to download them on PC?
- How to view iPhone photos and videos on PC?
- How to enable and disable wireless connection in CopyTrans Studio?
- How to view HEIC photos on PC?
- How to convert HEIC to JPG with CopyTrans Studio
- How to save iPhone photos by date